Honey Nut!

photo(8)
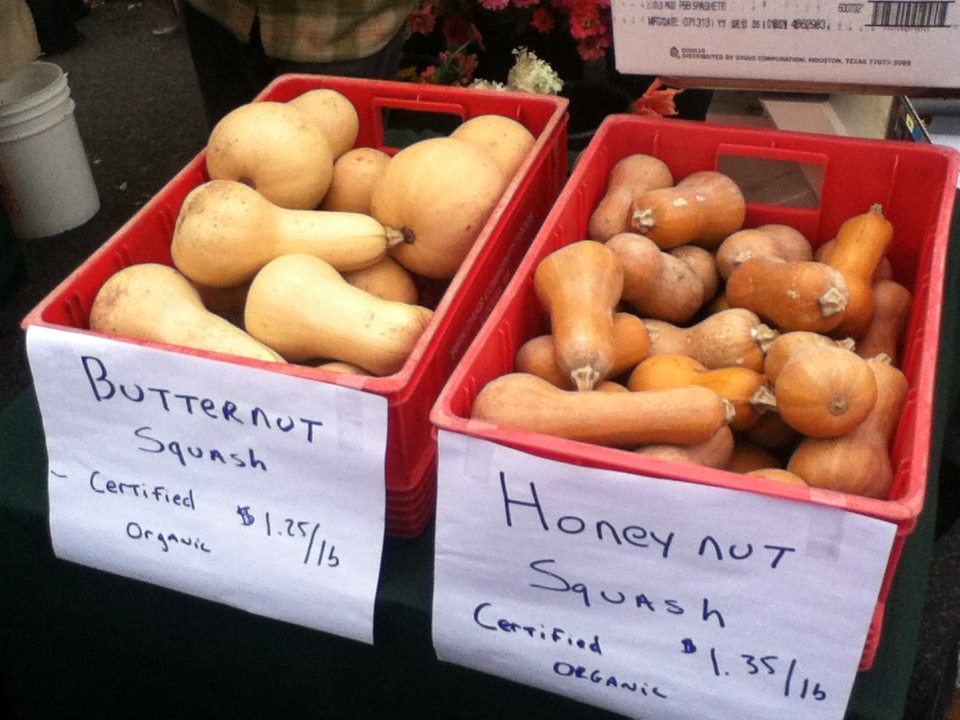
Have you ever heard of Honey Nut Squash?  I had not when I walked past them at market Saturday morning. They appeared to be a smaller, darker version of butternut squash and I was told the flavor was similar as well, if not a bit more concentrated.  I grabbed a small handful and brought them home to experiment with.

name 013Each squash was about the size of my hand.  I sliced them in half, scooped out the seeds and roasted them, flesh side down, in a baking pan with about a half inch of water.

name 016
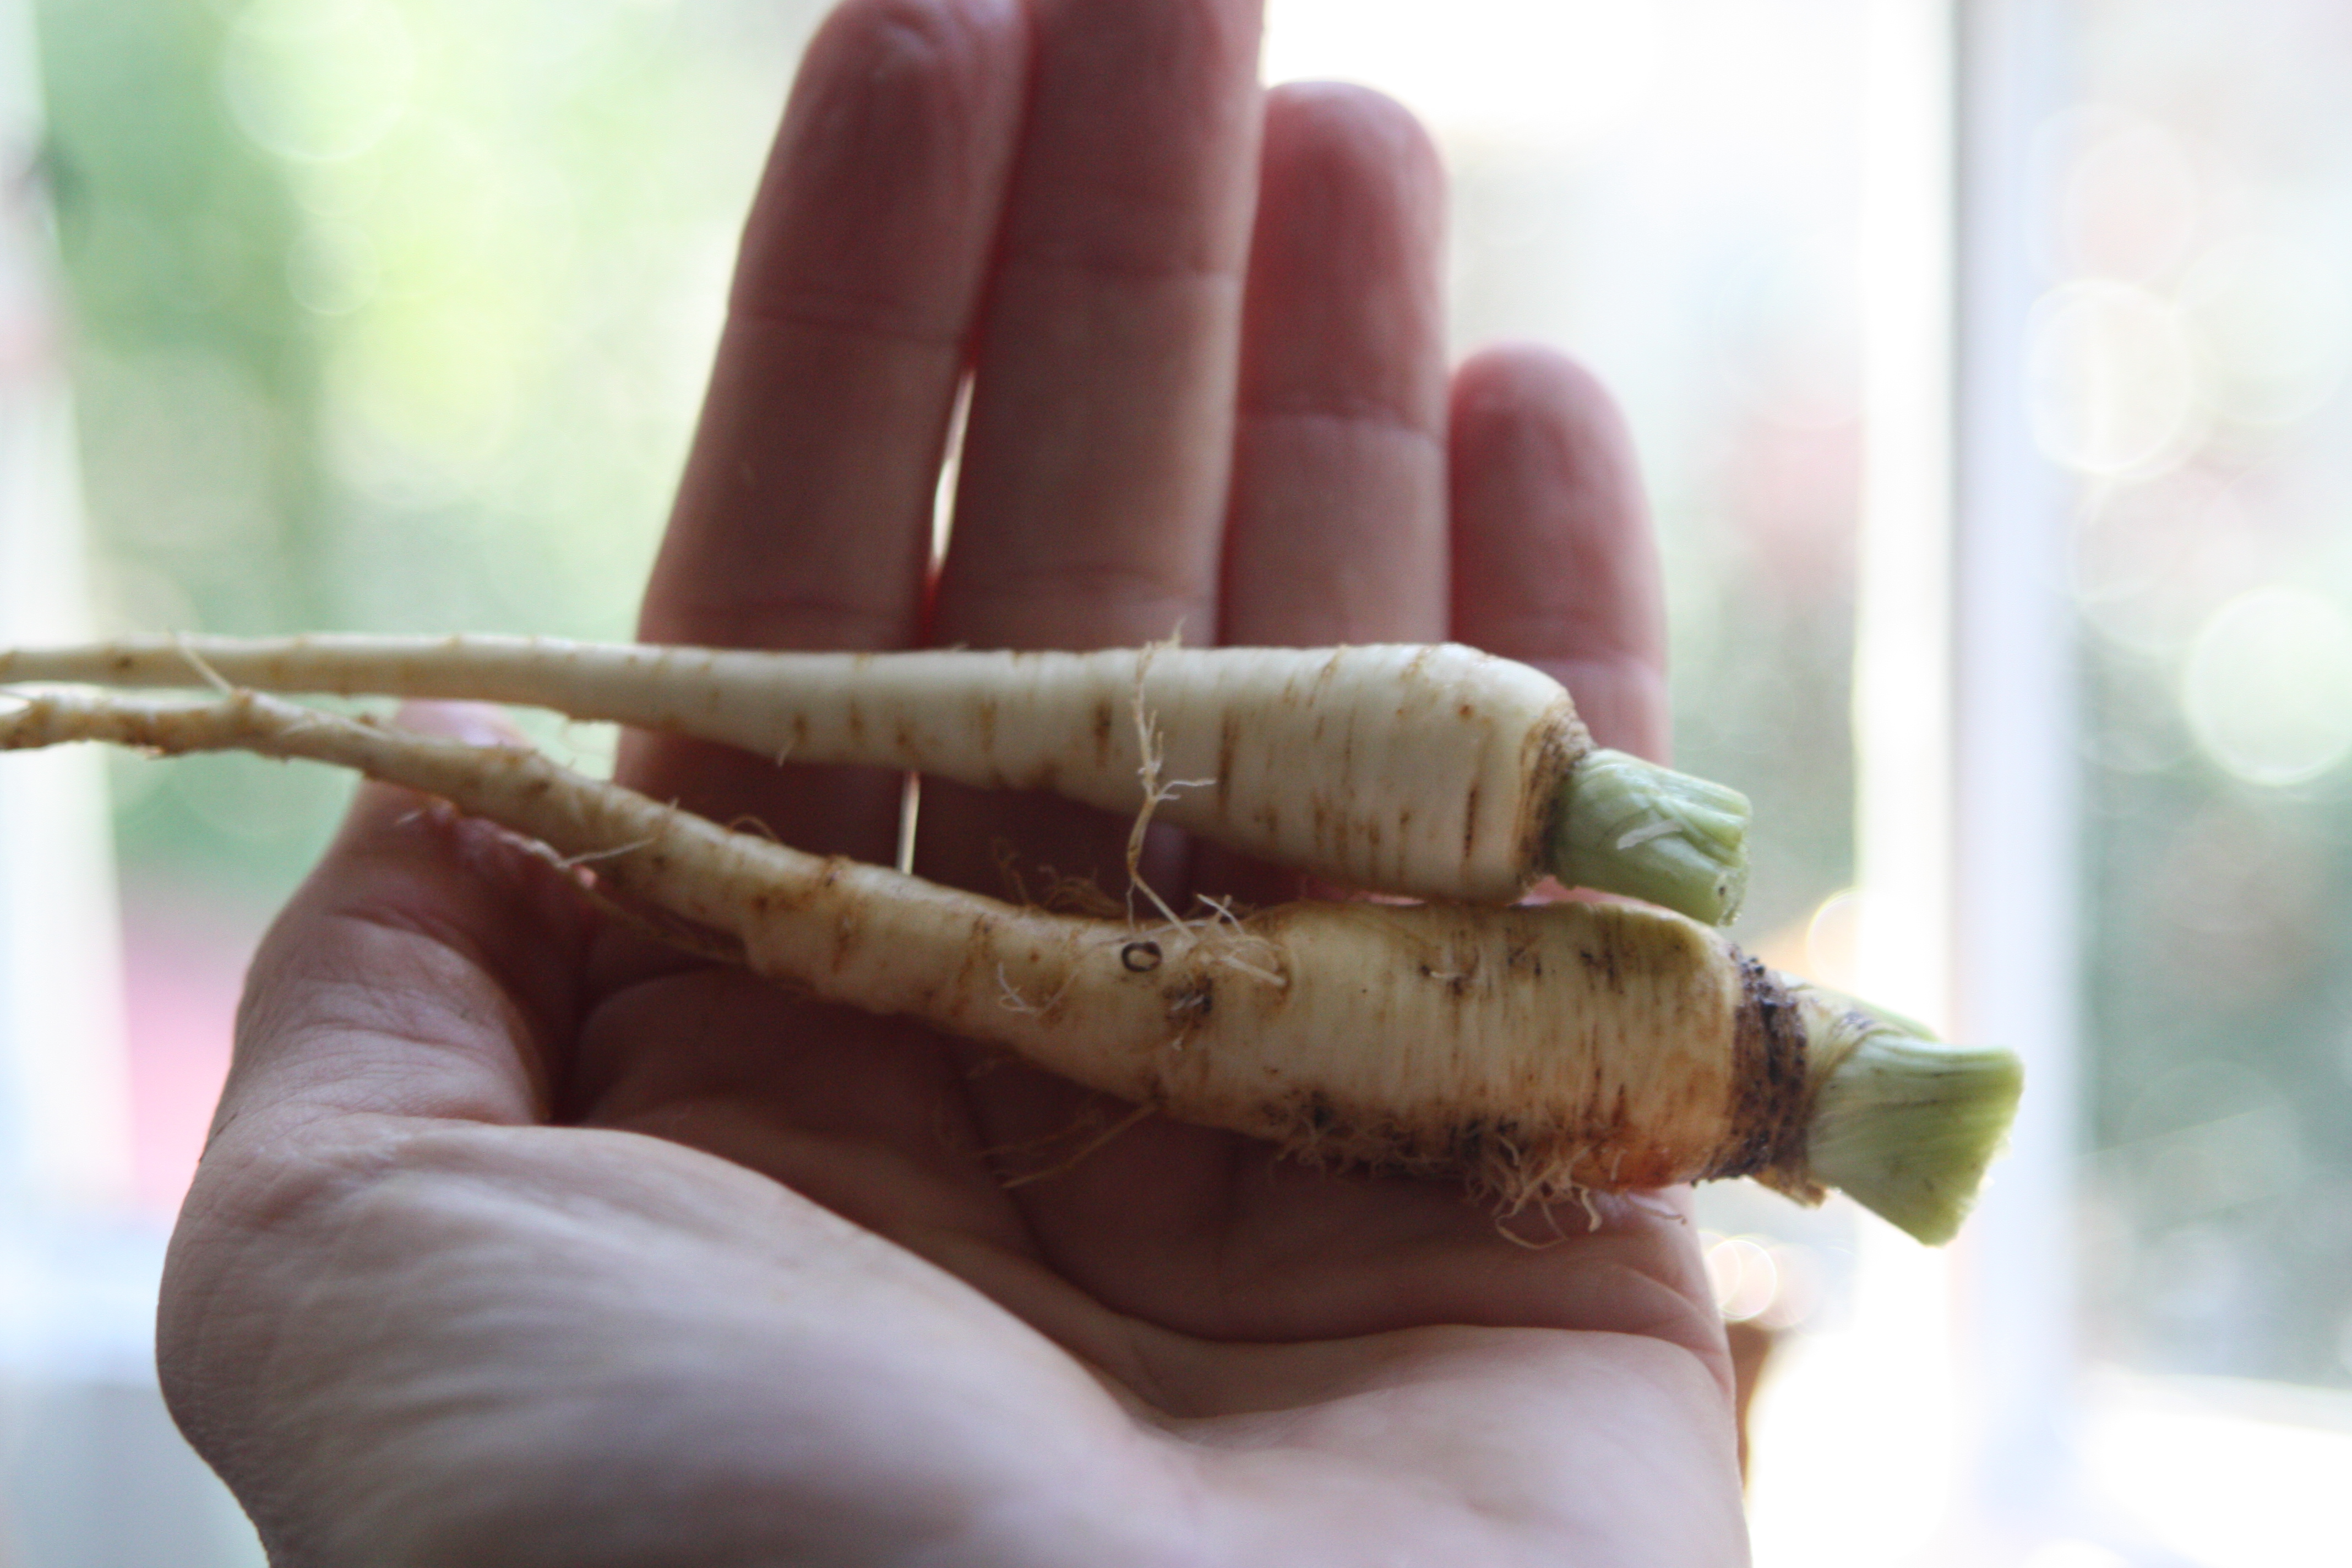
One of my favorite combinations is butternut squash and parsnips.  I figured honey nut squash would pair nicely with them as well and as I just so happened to be harvesting my not-entirely-bumper crop of parsnips, I roasted some of them in the oven while it was on.  Roasted squash and parsnips are the start of many a meal in this house this time of year – on their own with some butter they are a nice side dish, add some broth or milk or both and create a soup, add an egg and some flour and make a squash ‘pancake’ (think potato pancakes).    I had a hankering for something with a little kick to it, to balance out the sweetness.  This time of year also makes me crave curries, so I decided to get jiggy with some curry powder and make a curried cream of squash soup.  Served on the side was some roasted okra, which at first was seen as a slightly interesting combination, but you know what?  It turned out to be quite lovely.  Okra season is definitely winding down, which is a bummer, because roasted okra may actually be better than fried – and we love fried okra.

okra
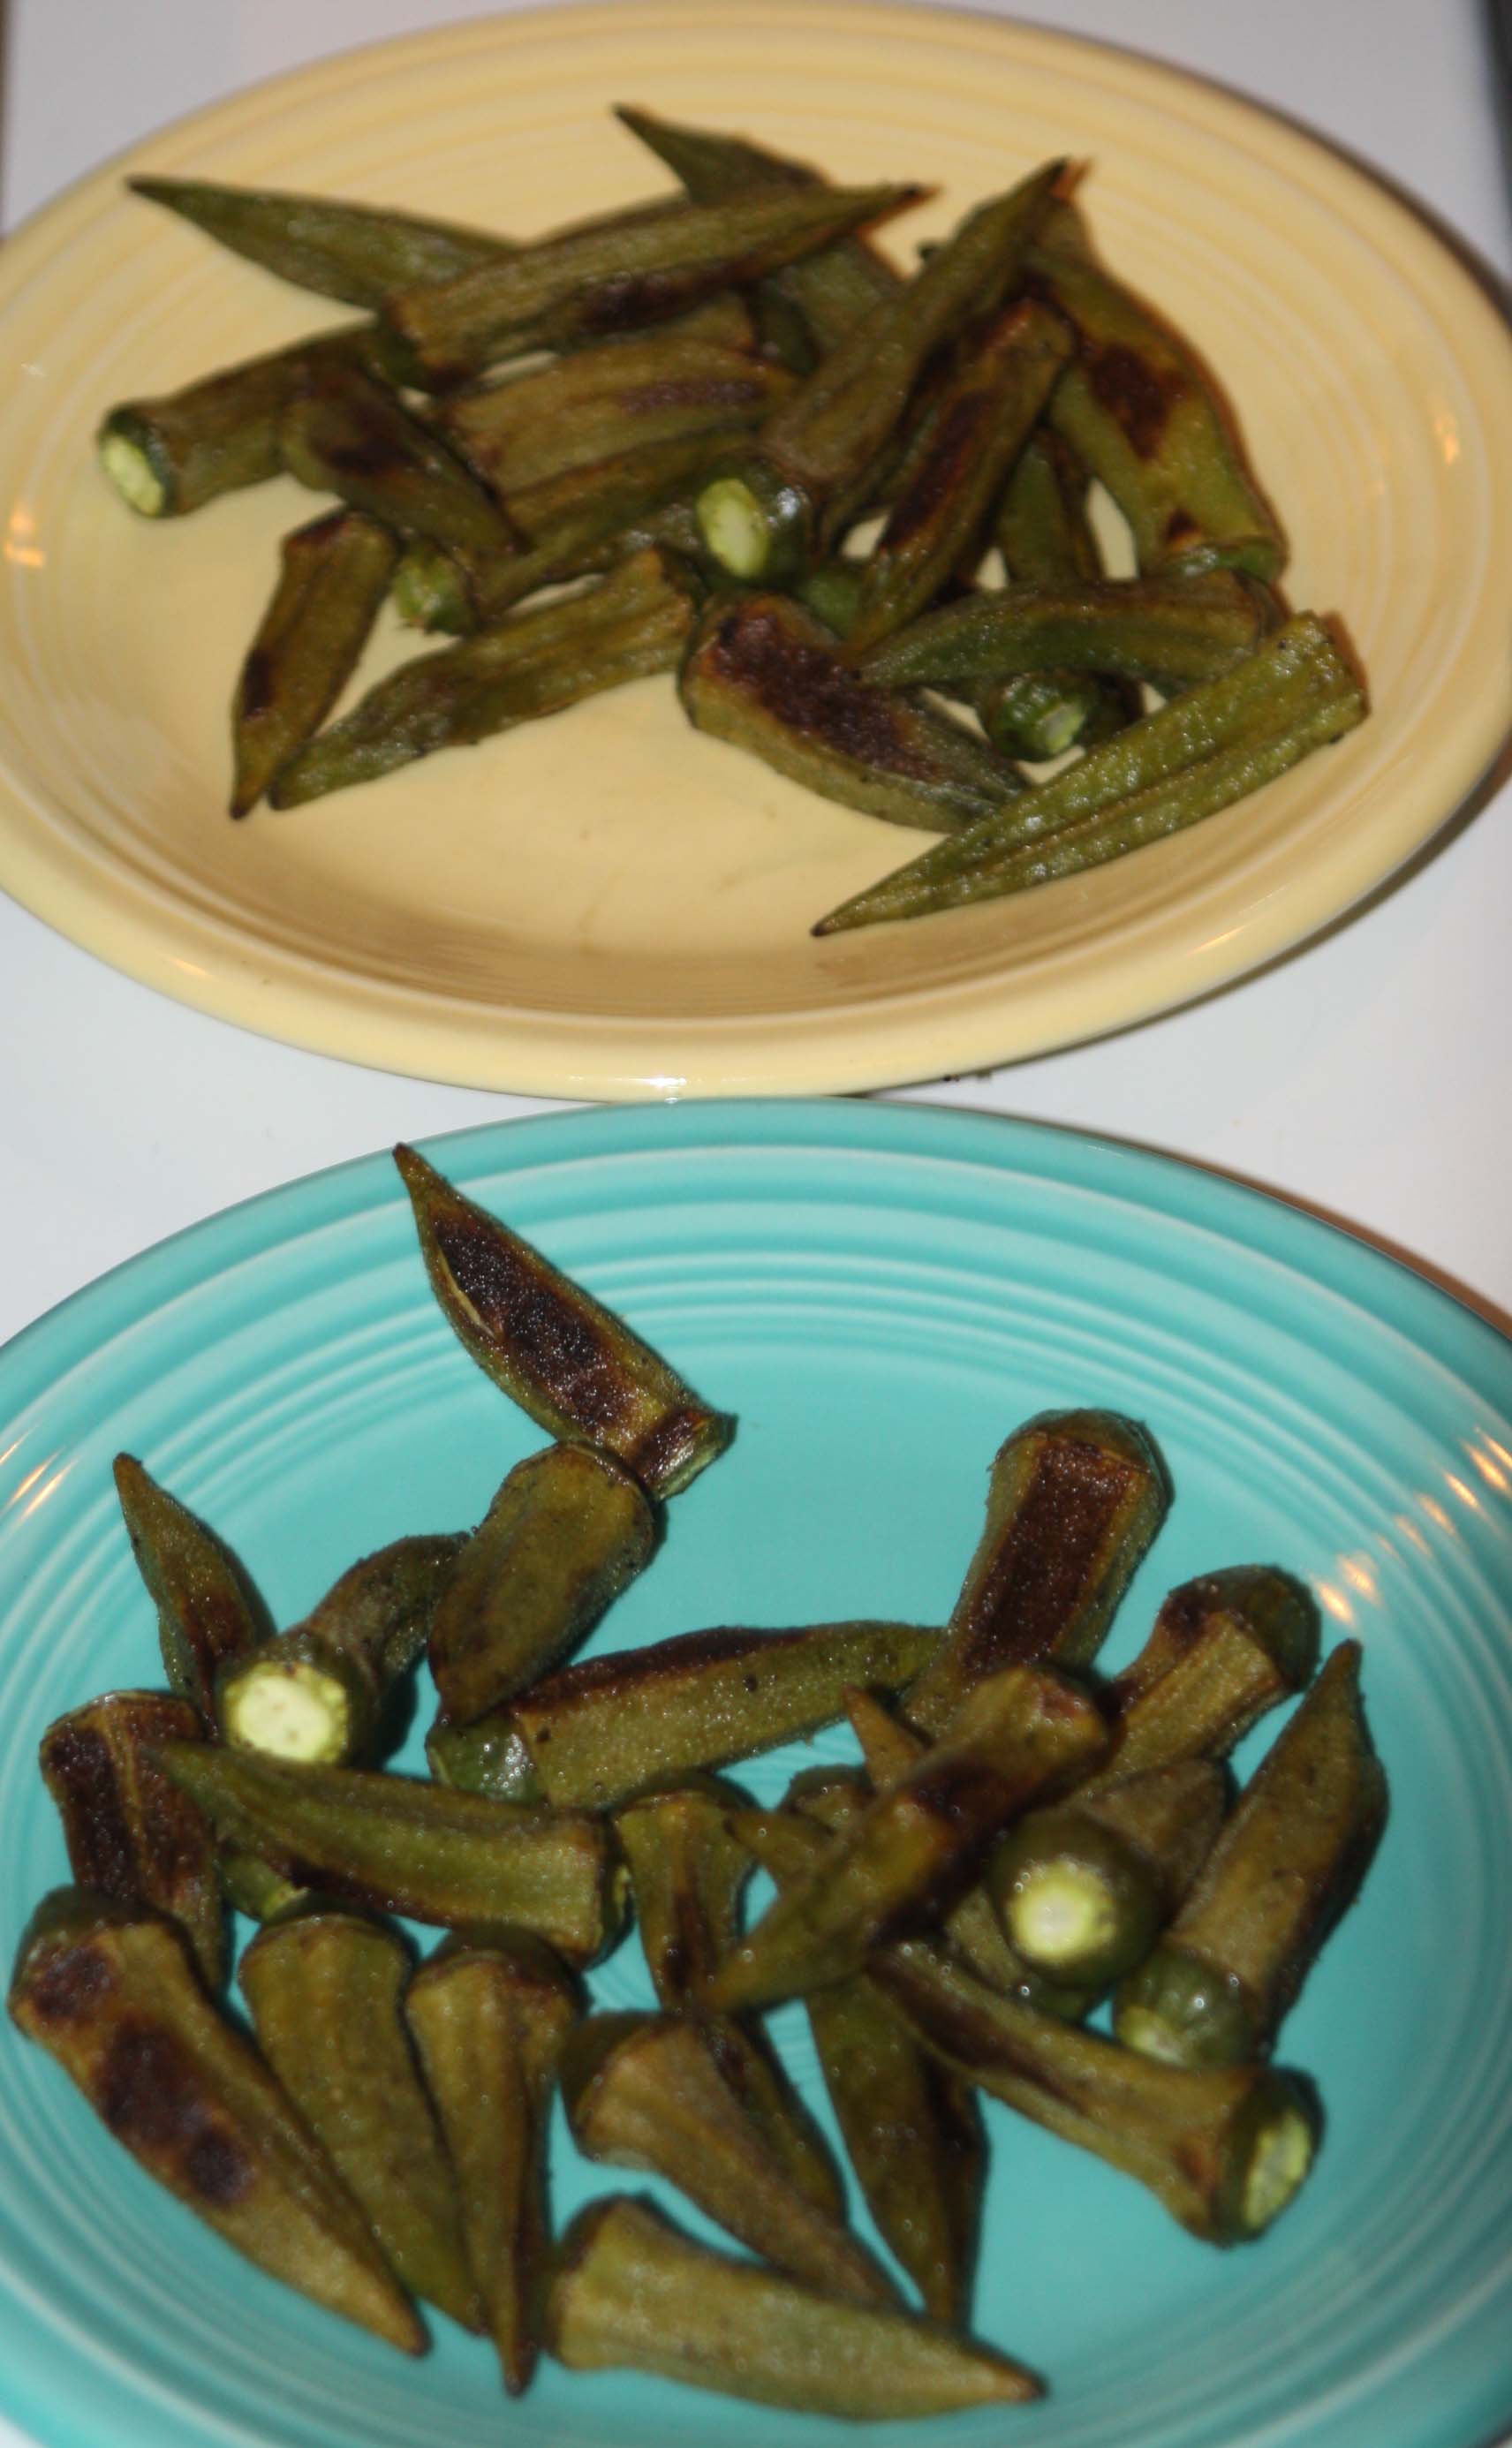
To answer the question, no roasted okra is not slimy (no properly cooked okra is slimy).  Toss it with olive oil, salt & pepper and roast at 450 for about 15 minutes.  Serve.  That easy.

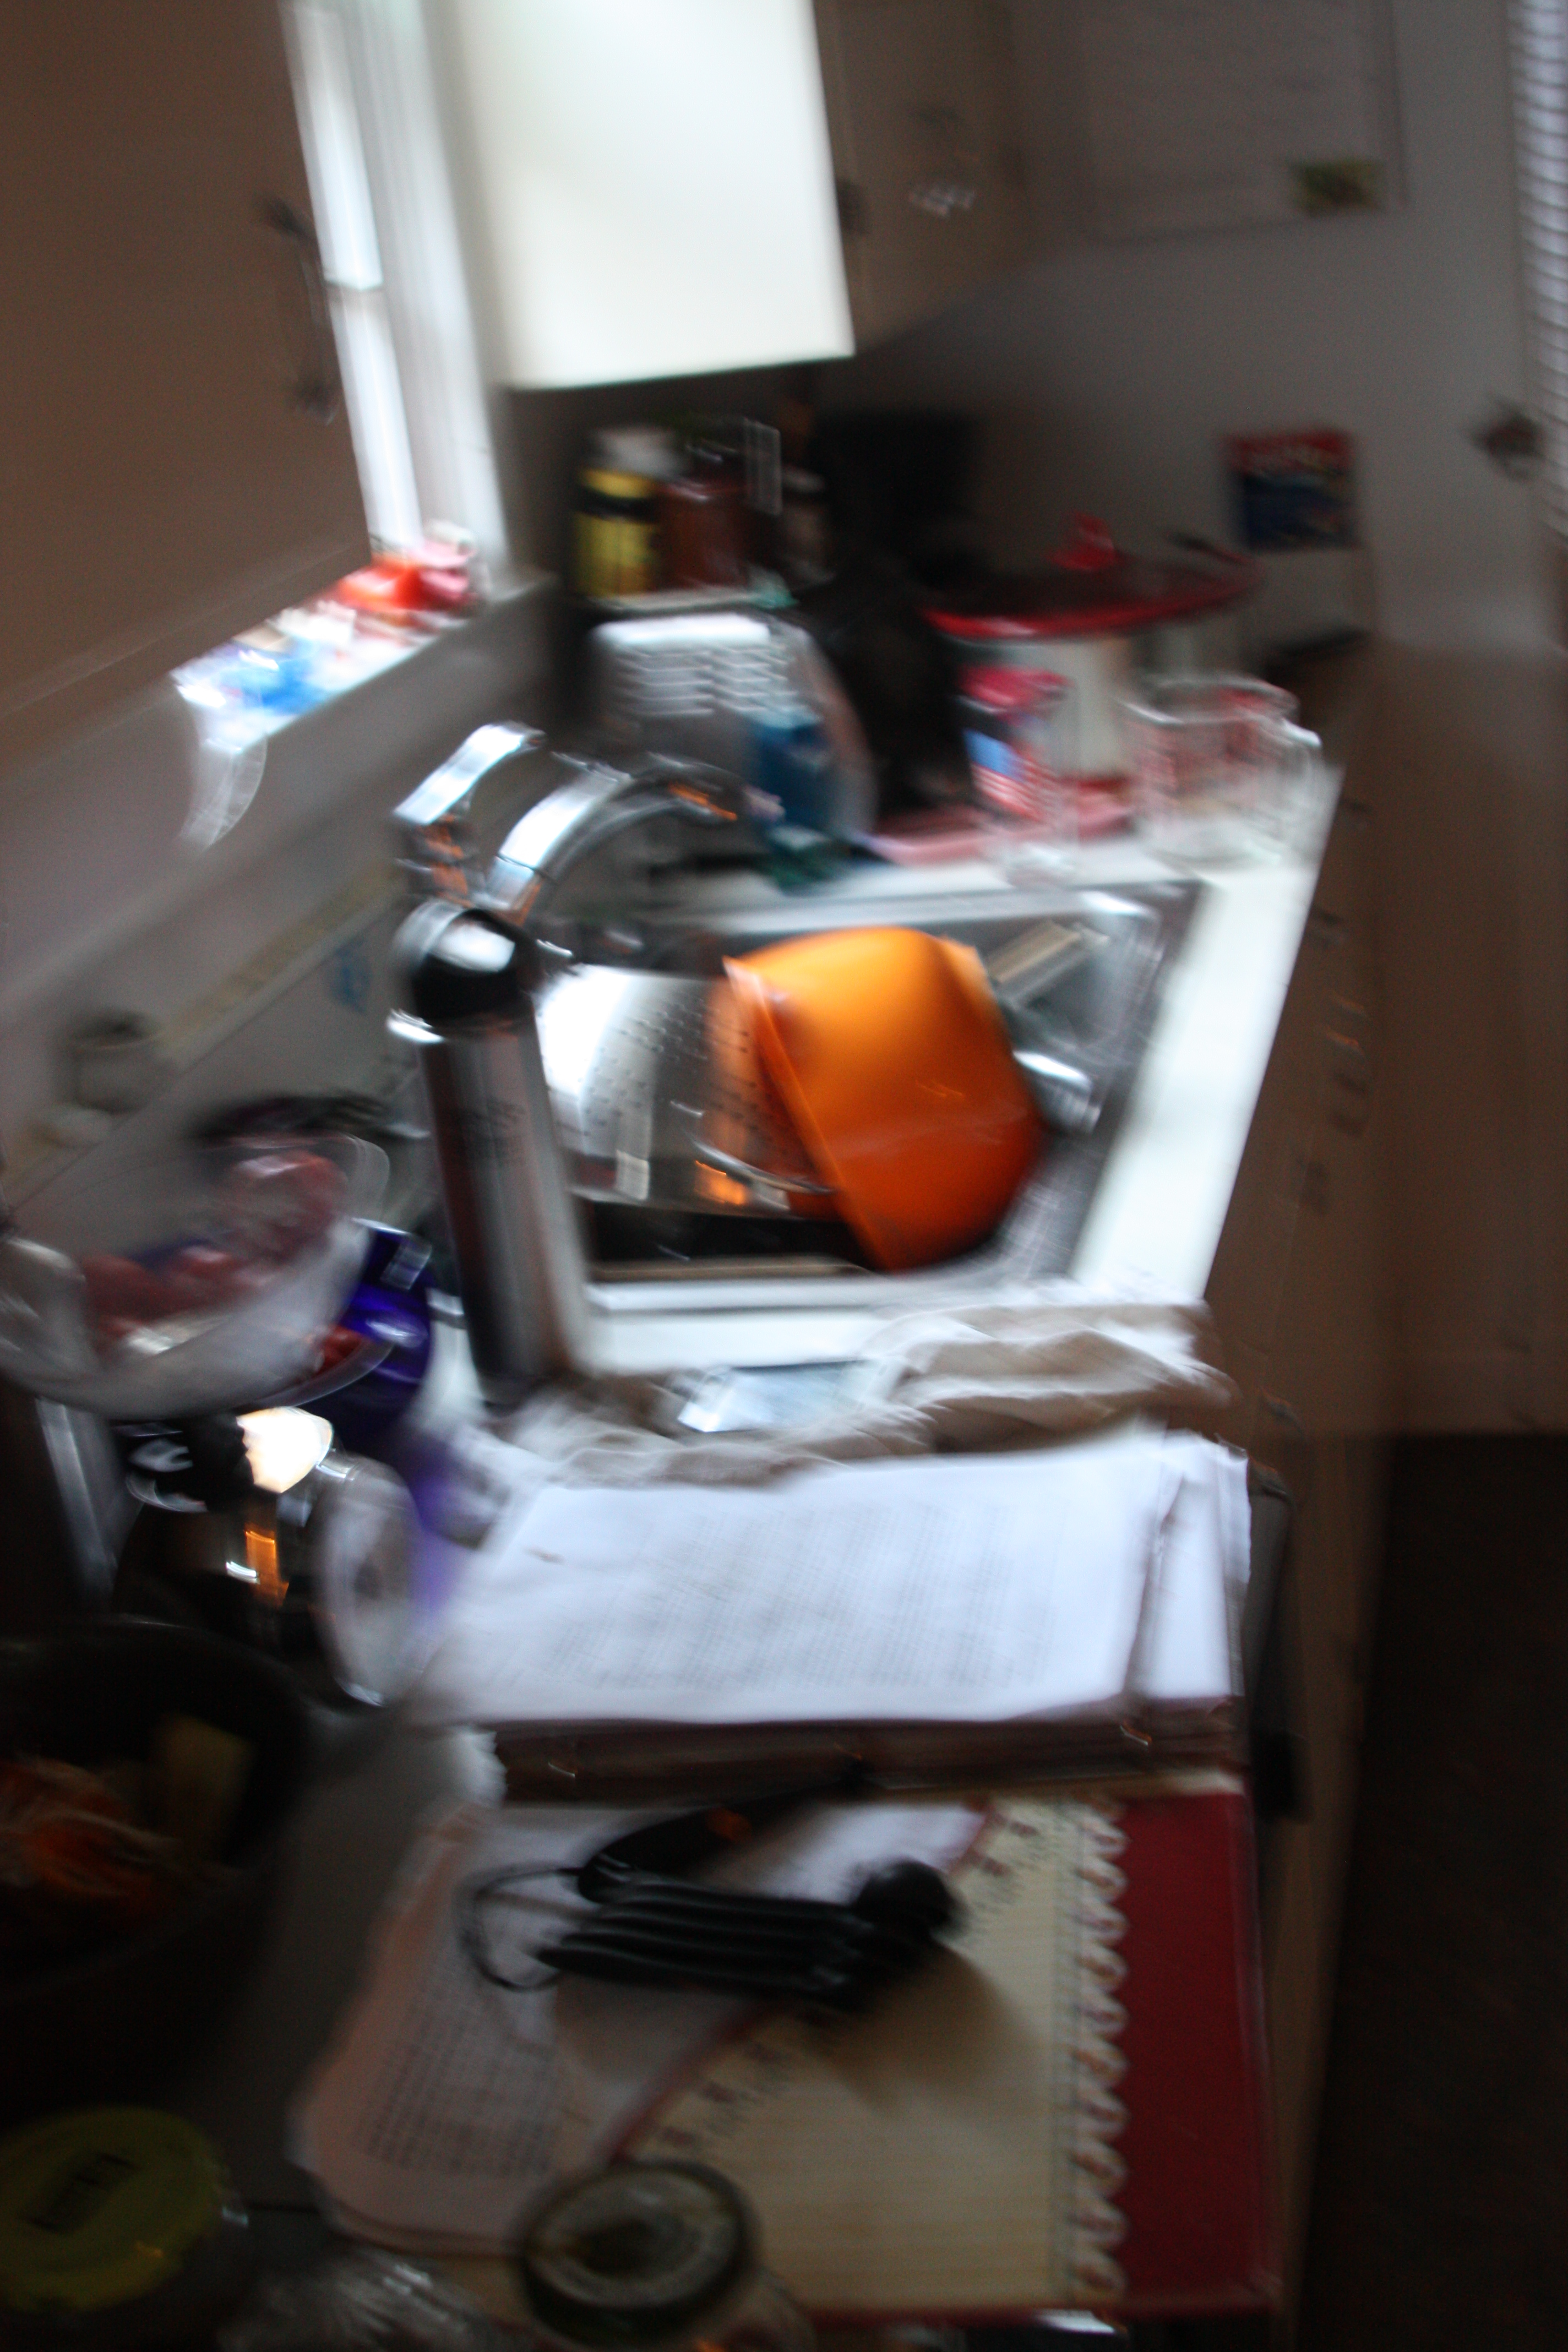
As for the soup, if you can’t find honey nut squash, you can easily substitute butternut squash.  While the flavor in the honey nut squash was a little sweeter than butternut squash, there was not much yield from 4 of them, which made just enough soup for the 3 of us for dinner with no leftovers for lunches.  I don’t have a pretty shot of the finished soup either – as I was making dinner, I was of course doing numerous other things while attempting to get dinner on the table at a reasonable hour on a school night with my kitchen looking something like this:

name 019That’s right, every square inch of my counter top was being used by something.  I absolutely will share with you the other projects I had going on (rending pork fat into lard & rice bread), but for now you are only getting my Curried Squash & Parsnip soup recipe.

As per my usual, I’m guesstimating amounts here, as the only time I ever bother to properly measure anything is when I’m baking.  Take away the curry powder and you have my recipe for creamy squash & parsnip soup.  Cut the amount of liquid and you have my basic recipe for mashed roasted squash and parsnips.   This is the first year we haven’t had a bumper crop of volunteer butternut squash in the garden and I’m finding I miss having a pile of them to use up.  I guess I’ll actually have to plant some next year – and I’m definitely planting those honey nut squash.  I’ve got a nice handful of seeds drying out right now that I saved from the chicken scrap bowl for next year’s garden.

Enough babble.  Onto the recipe.

Curried Roasted Squash & Parsnip Soup.

Slice squash in half, scooping out seeds and placing flesh side down in a baking pan with about an inch or so of water.  Bake at 350 until squash is soft and the flesh is easily scooped out. Set aside. Toss parsnips with olive oil and roast until soft. 

Saute chopped onion in oil (or butter) until translucent.  Add a few cloves of minced garlic and freshly grated ginger.  (I used about 4 cloves of garlic and about an inch of ginger).  Stir in, then add a teaspoon of curry powder.  Cook for 2 minutes or until wonderfully fragrant, add about a teaspoon of flour, cook another minute, stirring.  Add the roasted vegetables and a cup or so of broth.  (I used vegetable, but chicken is nice too).  Add salt – about a teaspoon –  and pepper to taste and bring to a simmer.  Puree soup, leaving no chunks, then add about a cup of milk or more (or cream.  Or both.  I like to use half heavy cream, half skim milk) until you reach desired consistency.  Bring the soup to not quite a simmer and serve.

I imagine this soup would be even better if made ahead of time, then left alone for a few hours for the flavors to meld more.  It might also be nice with coconut milk.  It could also be made without any milk, just broth.

Pizza lately.


Pizza for dinner is a regular occurrence around here.  I make a batch of dough and split it, creating two slightly thin crusts.  One becomes something more standard for whatever kids are around for dinner and one gets to be some version of clean out the fridge pizza, using up whatever I have on hand.

name 004Lately, that means what Edie dubbed “fabulous pizza” when she about 3 or 4.  The rest of the world may know it as Pizza Margherita, but in this house, pizza made with tomatoes, basil and fresh mozzarella is fabulous pizza.

name 003My most recent pizza experiment that turned out surprisingly well used tomatillo salsa for sauce, monterey jack cheese, arugula, jalapenos and Caromont Farm fresh chevre.  The tomatillos, arugula and jalapenos all came from the garden, as did the tomatoes and basil on the fabulous pizza.  It was one of those dishes that is better than the sum of its parts.  The mildness of the jack cheese was a nice counterpoint that tied together the creamy- savory-with a bit of a bite thing going on.

It’s not just me apparently.

After doing some reading as well as talking to some of my chef friends, I made an adjustment to my pickled peaches recipe in that I cut the processing time by half to 10 minutes for a pint.  Most pickle recipes have a 10 minute processing time, some as short as 5 minutes.  In reading every pickled peach recipe I have been able to track down, I’ve seen a wide range of processing times.   In comparing them all, I looked at the amount of vinegar used.  I found recipes similar to mine had a shorter processing time, so I tried it out.  The resulting pickles have been much firmer, as you can see in the pie I made with them. Continue reading

Jamming.

While I might be more known to pickle everything in sight, I do tend to make a batch of jam here & there upon occasion.  Jam took me quite some time to really master – somehow I was able to teach others how to do it without ever actually being successful at it myself.  I know, go figure.  The people that live in my house, scarred by years of bad jam, prefer to not eat the jam I make.  One of them requests I purchase large tubs of just plain, grape jelly that the act of making a pb& j doesn’t use half a jar.  The other has decided she’s only going to eat Daniel’s jam and when I get sneaky and reuse his jars, keeping the label and filling it with my own, she knows.

Continue reading

About those day lilies.

photo(3)I recently won this delightful cookbook, “Cooking with Flowers” (through a giveaway on Phickle).  A recipe for roasted daylily buds caught my eye – not just because we have a yard full of the flower, but because it was said that the roasted buds resemble roasted asparagus in taste.   I always feel that the end of asparagus season sneaks up on me – sure, I know it’s coming, but every year I find myself just a little bit saddened by it.   I always want more one taste to carry me through until next year. Continue reading

Down at Market.

IMG_6193

I totally meant to write this post earlier in the week,  but one thing after another popped up and next thing you know, it’s a week later and one realizes oh, that never happened.  And then, because I’m one of those people who believes that if you do something and you’re going to blog about it, you should do it in a timely manner, ie, just after it happens, I started debating whether to do it at all.  Sitting here on a Sunday morning where the sun can’t quite decide if it’s coming out or not, realizing that until this stinking dining room gets done, getting this house clean and decluttered is just not an option and I really should get myself geared up just a little bit more before jumping back into that dining room project, it seemed like I should write about it. Continue reading

As local as it gets.

DSCN1846We have a cherry tree in our front yard.  The neighborhood critters tend to get to it before we do, leaving us not more than a handful of cherries, at best.

This spring the tree was loaded.  You could see it walking down the street.  We had hope there would be enough for all of us.  Tuesday I had a bite of a cherry, realized they were not quite ripe yet, and noticed the tree was still loaded – a good sign.

Friday morning,  there was much activity at the tree.  Every bird & squirrel within a 6 block radius was feasting.  I ran out with my basket and picked everything within reach without a ladder.  I noticed a good deal of the fruit had some sort of funk, which was a bummer and the remaining fruit wasn’t entirely ripe, but I was going to get a crop off that tree dammit.

DSCN2000Two pounds later, I did.

Since they were mostly underripe, I knew cooking them was the way to go.  Having picked 8 pounds of strawberries later that day from our little garden patch, I thought about combining the two.

DSCN2003Yes, you read that right.  EIGHT POUNDS of berries from our little strawberry patch in one day.  Two pounds the day before that.  It’s been a banner year for strawberries.

Where was I? Oh that’s right, cherries.  First, I had to pit the cherries.  I got this little pitter last summer at Bed, Bath & Beyond.

DSCN2004

It pits four cherries at a time, popping the seeds out into a tray underneath.  That’s practically doing it in bulk when you think about it AND it keeps clean up to a minimum.  DSCN2005I love this thing.  I strongly recommend it, especially if you are considering doing anything with cherries this summer.

DSCN2027After pitting the cherries, I chopped up an equal amount of strawberries, added sugar and let it macerate overnight.  I found this great post on Northwest Edible Life on making pectin free jam without a recipe that I used as a guideline.  Because my cherries were not fully ripe, I went with 1/2 cup sugar for each pound of fruit.

DSCN2030The resulting jam is sweeter than I expected it to be, with big chunks of fruit.

DSCN2049

I packed it in 4 oz jars, trying to stretch out the yield as much as I could.   The result?  8 lovely jars of what we are calling “Greenleaf Cherry Berry”.  I’m beyond excited that we grew enough fruit to make jam with this year.  Take that squirrels.DSCN2058

Spread on sourdough toast for breakfast, it’s quite lovely if I do say so myself.

Cherry Berry Jam

2 pounds cherries, pitted & chopped

2 pounds strawberries, chopped

Combine the fruit in a non-reactive bowl with 1-2 cups of sugar.  Cover and refrigerate overnight (or longer).  Simmer on stove top, stirring occasionally.  As the fruit starts to fall apart, you can mash it if you’d like.  Add 2 tablespoons lemon juice and cook until it is ‘set’.  Pack into jars and process in a hot water bath for 10 minutes.

Yield – 4 pints.

Banana Pudding

DSCN2022One of the offices I worked in back in our Birmingham days was on the daily fax list of a local meat & three lunch establishment, which meant we got their specials every day with a very convenient order form on the bottom that all you had to do was fill out and fax back to place your lunch order. Thursdays were Banana Pudding Day (also squash casserole day and don’t ask me how I remember either fact).  It was the kind that was made from scratch, with Nilla Wafers and real bananas.   I came into work one day to find on my desk a note from this very sweet older woman I worked with.  It contained her recipe for Banana Pudding, that she swore was better than Joel’s  (the name of the restaurant).  I was skeptical, but she assured me that whipping the egg whites was a great use for the KitchenAid stand mixer my boyfriend had recently given me, hoping to encourage me to learn to bake.  She assured me, this was a recipe he’d appreciate me learning to make.

DSCN2018I found myself with a half gallon of raw milk Saturday.  I was told it was a few days old and that cooking with it would be best.  And immediately, the idea of banana pudding popped into my head.   Just as quickly, Pat offered to run up to Reid’s for anything else that was needed to make this idea happen.  He loves banana pudding and this recipe?  Pat’s seventy-something father has said it’s just like the banana pudding his mother made when he was boy.  It’s the real deal.

DSCN2017Juanita was right when she said my boyfriend would appreciate this pudding recipe.  Even though he’s now my husband, he still appreciates it.

DSCN2023If you’ve never made your own pudding before, this is the one to start with.   It’s the banana pudding your grandmother made.  Or your grandmother-in-law as the case may be.

Juanita’s Homemade Banana Pudding

Line pie plate or glass baking dish with Vanilla wafers.  Slice 3 bananas (or more) on top of waters.

Scald 3 cups milk until a film appears on the top.

Beat 3 egg yolks and set aside.  Set 3 egg whites aside.

Combine 1/2 cup sugar with 3 heaping Tablespoons corn starch.   Pour some of your hot milk into the sugar/cornstarch mix until smooth, then whisk the mixture into your milk, stirring until thickened.

Pour 1/2 cup of the milk mix into the egg yolks.  Blend, then slowly stir into the rest of the milk mixture.  Pour mixture over your wafers & bananas. 

Beat 3 egg whites until stiff.  Add 3 Tablespoons sugar and beat until stiff peaks form.  Spread on top of pudding and carefully broil until golden brown on top.

banana pudding

It’s Canning Season.

Sarah Cramer Shields for Beyond the Flavor

Sarah Cramer Shields for Beyond the Flavor

I kicked off the season of canning classes at The Happy Cook last night.    Thanks everyone who came out – I had a blast, I hope you did too while learning something.   I’m happy to report that the jam I rushed into jars last night that hadn’t quite set was good and firm when I got up this morning.  Hooray.   A jam success story!

I popped open a few jars of pickles  in last night’s class and when asked for the recipes, I promised to get them up on here.  My friend Justin was there with his camera last night, capturing the class for an upcoming blog post for The Happy Cook and I’m going to let him sum up the class for everyone while I post the requested recipes and links.

And for everyone who didn’t make it to last night’s class, there will be plenty more as the season progresses.  Keep an eye on my Events page, for others.  I’ll be at The Happy Cook again on May 28 with more hot water bath canning and on June 11 with pressure canning.  Onto the recipes…..

Continue reading