How to make Watermelon Rind Pickles.

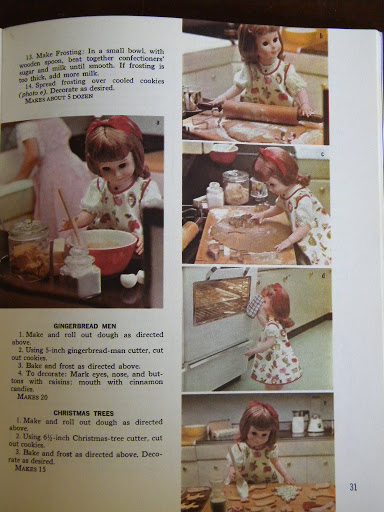
First, you consult every cookbook in the cabinet. You pull out all the ones that have a pickled watermelon rind recipe. Then you look to see what all the differences are and pick one.
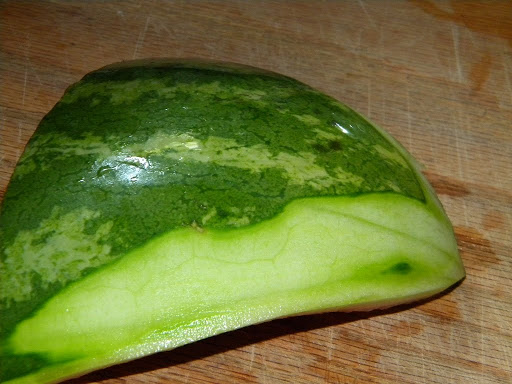
Then, you take the rind of a watermelon. You peel the green outer layer off.
You chop it and soak it overnight in pickling lime. I read if you leave some of the pink on, it looks prettier. So I did.

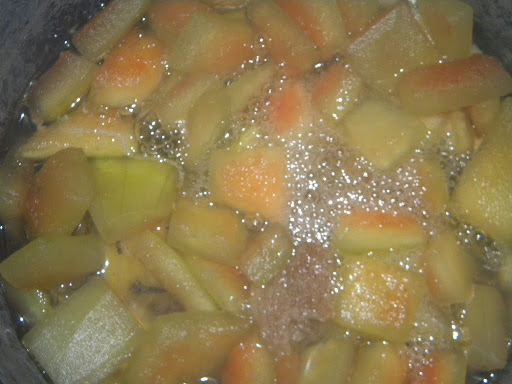
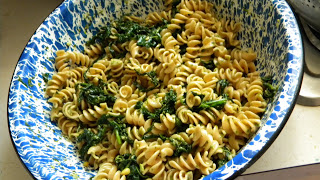
You simmer it until translucent in a brine of sugar, vinegar and water, as well as select spices.


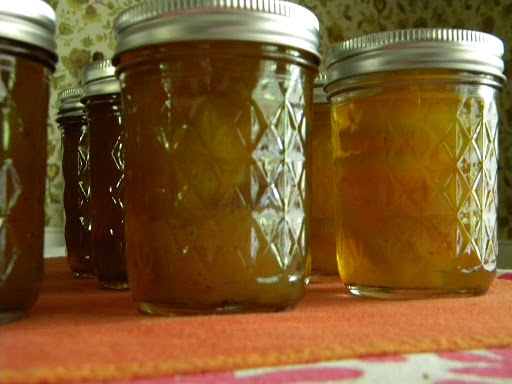
When it has achieved proper translucence, you pack it in jars, pouring the brine on top.

Process for 10 minutes and VOILA! Watermelon rind pickles!

I am the sort of person who hates to throw things out, I’m convinced I can get one more use out of it. I use vegetable scraps to make a broth before I put them in the compost bin. I turned a bedsheet turned shower curtain that I thrifted into matching skirts for me & Edie. If there is a way to find a new life for an object, I am all about it. So, watermelon rind pickles have appealed to me for years. I’ve never actually had one, but I love the idea. So, I finally decided to try them.

I pulled out every last cookbook I own and came up with 6 different recipes for them. Then I went on the internet and read some more about them. A friend who is a chef, who’s had them but never made them said to use pickling lime. Never used that before and only one recipe from my 6 had that. I found a recipe on a blog that used lime and it was from a New Orleans chef. The one recipe I had that used pickling lime was in one of those collections from a former college roommate’s grandmother’s church – you know the kind, the ones everyone submits a recipe for and they sell to raise money for something? I have a whole collection of them – all your best home cooking is right there in those.

Anyway, I had two seemingly credible recipes that involved the same proportions of sugar, vinegar and water, as well as similar spices. In talking to folks that have actually had these before, I made sure to ask about the spices, and the ones included in these two recipes came up time and time again.
A friend offered to come help, she’d actually eaten them before and so she had a good idea of what they needed to look like. She brought a few more recipes, one of which matched up with the two I was following, so I felt I was on the right track. Thank goodness she was here, because I probably would have jarred them up as soon as they started looking translucent. It’s a long time before they start looking that way and are totally that way.
The one deviation I made was cardamom. Betty said you needed it in there and one of the recipes called for cardamom seeds. I borrowed some ground from Betty and just threw it in, not measuring, just eyeballing. That’s the one part of the equation I’m not 100% on. Betty came by today though and looked at a jar up close and said they LOOK like the ones her grandmother made. In 6 weeks, we’ll know how close they are to TASTING like them.
The Recipe:
Take one watermelon rind. Peel the outer green layer off with a vegetable peeler. Cut into 1 inch by 1 inch pieces.
Dissolve 3 teaspoons lime in 2 quarts water. Pour over watermelon rind and soak overnight. Rinse at least 3x, or until water runs clear.
Combine:
8 cups sugar
4 cups water
4 cups white vinegar
Bring to a simmer.
Tie in spice bag and put in simmering liquid:
1 lemon, thinly sliced
1 large piece of ginger
3 sticks cinnamon
1 tablespoon whole cloves
(Generous sprinkle of cardamom)
Simmer spices in brine for 10 minutes, then add watermelon rinds. Simmer until translucent – this actually took about 2 hours. Pack in jars, cover with brine and process in a hot water bath for 10 minutes.
I used one decent sized watermelon and got a dozen jelly jars full.

This year’s cake.

Every year, I bake a cake for my dear friend Betty’s birthday. It’s always chocolate, usually something over the top, almost always a work of art. This year’s was no exception. I asked Edie to help me pick out a new recipe and she opened the Martha Stewart Desserts cookbook right to this. A devil’s food cake. It looked easy enough, the ingredients list was relatively short, I figured why not?
Things I learned? Transporting a triple layer cake is no easy feat. Next time, I’ll assemble it there. I thought the cake itself was a wee bit on the dry side – it may have been slightly overbaked, but it was still good. And the frosting. Oh my. It took 2 and a half hours to make, stirring it every 15-20 minutes. Worth it. The recipe makes enough for you to assemble a three layer cake and fix just about every shortcoming with a mound of frosting. Now, that’s a good recipe.

When I don’t feel like cooking, I come up with the best stuff.

I just didn’t feel like cooking the other night, so I sent Pat up to Mona Lisa Pasta to grab some dough balls for pizza. Because somehow, that makes me feel like I haven’t cooked. Go figure.
I pulled some artichoke lemon pesto out of the freezer, thawed it and slapped it on there. I roasted some asparagus and threw that on one of the pizzas, the other was definitely an experiment. On his way home from grabbing the pizza dough, a neighbor flagged Pat and handed him a handful of baby red cabbage greens. He wanted to eat them and he wanted to eat them right then. Having no clue if it would work out, I sauteed them in some bacon drippings with onions & garlic, then threw some bacon in at the last minute (also from the freezer. I do love my freezer.) That combo went on the second pizza.
And I just want to say, it turned out beautifully. I’m in awe of my culinary genius.
Here’s my recipe for the pesto. If you’ve never had artichoke lemon pesto, it’s great on pizza and as a spread for a nice grilled tomato/fresh mozz/basil sandwich. Try it.
Artichoke Lemon Pesto
1 can artichoke hearts
2-3 minced garlic cloves (or more)
1/3 cup olive oil
Juice & zest of a half to a whole lemon
1/4 cup chopped parsley
1/4 cup walnuts
Salt
1/2 cup Parmesan Cheese
Throw it all in the food processor and pulse until it’s a nice creamy pesto.
Enjoy!

Yard Sale Season Rocks.

I have a thing for vintage cookbooks. But I have a thing for books in general, so when I saw this set of 18 circa 1972 McCall’s Cookbook Collection at a yard sale this weekend, I almost passed. I’m supposed to be on a no-net gain of any books and I just got a new salad book for Mother’s Day. These didn’t look like they had ever really been used and part of the thing I love the most about vintage cookbooks is the notes the previous owners left behind. But then I started looking. From the “Show Off Cookbook”, I present:

It seems that even in 1972, women were still trying to trap a man by her cooking. I know it worked for me…(Well, it did. I only learned to cook because I told that cute boy I knew how and I then proceeded to learn just as quick as I possibly could.)

The Book of Merry Eating.

Look at those illustrations from the Cookie Cookbook. Very “Lonely Doll”. And the only one like that in the whole set.


The Show-off Cookbook. With instructions to cook your way into that Man’s heart right there on the front cover.

I love that the cover of the salad cookbook is a molded castle jello salad.

This is the one that sold me on the entire set. A pineapple fashioned of cheese & olives? An entire cookbook on finger foods? Oh yes please. Not to mention a whole section on hibachi treats. And dips that are ‘definitely different’.


The whole set came in the original plastic box and really, doesn’t take up that much room at all. Turns out I did have room for them in my cookbook cupboard without getting rid of any cookbooks!
They were published in a cross between a magazine and a paperback and are a complete treasure trove of ideas and recipes. A whole book on ‘Marvelous Meats’. Cookies, Desserts, a few party cookbooks, it’s going to take me weeks probably to sort through them all. Eighteen cookbooks….. it seems slightly excessive, but I had to have the set. Don’t you agree?
And bonus, in the back of the index book, I found a handwritten recipe for fruit cake. I know have at least 4 hand written fruit cake recipes from my vintage cookbooks. I think I might need to try one this year. After all, it was the one handwritten note in all 18 books…..

The Arugula has bolted.

Last fall, I threw some arugula seeds in the ground and before all of those lovely greens got picked and eaten, it started snowing. And those greens stayed buried under snow the better part of December, January, February & into March. That picture up there is what they looked like when the snow melted last month. I didn’t know if they had actually made it, but turns out they did and of course, bolted first chance they got. Consequently, we’ve been eating some nice, fresh, locally grown greens in alot of meals this week. A nice mushroom arugula risotto one night, tonight a deconstructed arugula pesto, augmented with some arugula pesto from the freezer. Clearly, we like to let our arugula bolt around here. We may even like it more cooked than in salads.

I sauteed some arugula with garlic and pine nuts in olive oil, then tossed in the pesto, then tossed it all with some pasta. It’s darn tasty if I say so myself. And feels great to be able to eat our own food fresh from the garden again. It’s the only thing ready to pick right now, besides some chives, but it feels great to be able to walk outside and pick dinner again. Especially during this glorious 80 degree weather. Barefoot in the dirt hasn’t felt so good in I don’t know how long.

Taking a wee breath.

So Edie has had something to do everyday after school this week, except today. I’m working more so I feel like I have less time to do anything, what with all the running we do. And the weekend is not looking too much better. There seems to be an endless list of things to do outside, inside and around the house. Gifts to be made and sent for last month’s birthdays. I am just not capable of doing anything on time anymore it seems.
But today was too pretty. I did take some time and just soak it in. Look at that sky. The tulip magnolia in the front yard is starting to bloom. When that’s done, the dogwoods will be about ready to bloom. This is how I measure spring.
I still managed to bake brownies for tomorrow’s spring fair at school. And banana bread for around here because I haven’t baked them anything since last weekend and pickings are slim for breakfast.
Actually, I don’t think I have enough oatmeal for my breakfast tomorrow. Good thing I baked.

Good.

Edie really likes carbs for breakfast. She’s quite happy with some toast or leftover biscuits or even better, english muffins. I, of course, like them to be somewhat nutritious and have taken to buying her whole wheat cinnamon raisin english muffins at the natural foods store. They are tasty and about the only ones I’ve been able to find on a regular basis without high fructose corn syrup, but they end up costing about a dollar a pop. Not nearly as cheap as my favorite, oatmeal, which also comes without HFCS.

While looking through one of my cookbooks one day, I stumbled upon a recipe for english muffins. Actually, it was a variation listed for yeast bread, so I decided to give it a whirl. It was under a paragraph and since I am game for anything under a paragraph unless it is a chocolate cake that comes with a picture that makes me WANT it, I thought, why not.
Turns out they are actually fairly easy, the hardest thing about them is that they need time. After the first rise, you roll them out, cut them with a biscuit cutter and let them rise on a cookie sheet. Instead of baking them, you cook them on a griddle at a low heat for 10 minutes per side. You really don’t even need to pay that much attention to them, which makes them perfect for me.
The bread recipe I like to use makes 2 loaves. I figured for my trial run, I would make one loaf of bread and use the dough for the other loaf to try these english muffins. I got well over a dozen of them – they were on the small side, but I don’t like her filling up on just carbs, I like to throw in some yogurt too, so they were really just about the right size.
And yes, they were tasty. See those nooks and crannies just like the old Thomas English Muffin ads? They toasted up beautifully too. For a fraction of the cost, I was able to make her breakfast for the next week at least, plus some for us. Definitely worth the time.
Might make me move off oatmeal and onto english muffins. That good.