An Evening of Culture.

DSCN1430

A few weeks ago, my friend Susan called and asked if I would help her put together an evening for her culture club.  She explained that the culture club sprung out of her book club – at some point, they realized that they really weren’t reading or discussing the books, but they still enjoyed getting together and doing things.  And thus, their culture club began.

DSCN1390 Continue reading

Candy Bar Cake.

Ben’s birthday was this weekend and I had grand plans for his cake this year, based on a pin of mine over on pinterest. But then somewhere around Tuesday, I sort of hit the wall for the week.  Which is the equivalent of realizing you’re ready for bed at 10:30 am on a day where you just don’t have the time to go to bed until about 11 that night. You know those days?  Well, that was my week.    Two solid months of being booked solid caught up with me in a huge way.  There wasn’t much I could really back out of, I just had to put on my big girl pants and get through it.  And that’s when I was inspired to reconsider Ben’s cake.  I knew I would be hard pressed to whip up a layer cake with fillings and frosting, but why couldn’t I take one of my fabulous flourless tortes and use that as a base for Ben’s requested  ‘chocolate, chocolate, chocolate’ cake?  Which is what I did.

DSCN1330

Continue reading

Projects and pizza.

When answering the question “What are you up to” over the last few weeks, my answer has been a curt “busy”.  Busy is a gross understatement.  I’ve had a number of projects on back burners that all seemingly reached a boiling point at once while having several fantastic opportunities fall into my lap, with everything needing my attention these last two weeks. It’s been a juggling act like I’ve never had.

DSCN0648 Continue reading

Basic Curry.

A few months ago, Betty handed me a cookbook she’d bought to give as a gift to someone, but before giving it, she thought I needed to be ‘made aware’ of it.  “I think this would be a good one to have around” she said.  I agreed and so proceeded to get myself a copy.
The book in question is “More with Less“. She had gotten it at the 10,000 Villages store on the downtown mall.  Both the cookbook and the international fair trade organization come from the Mennonite community with a focus on sustainability, using what you have and consuming less.
But I’m not talking about that here today.  You all know how I feel about talking about sustainability – I just prefer to do it and not talk about it. If you want to learn more about 10,000 Villages, click on some of the above links or go check out the store downtown.  And full disclosure, I first learned about their sustainable practice because a dear high school friend is their marketing director.  It was her Facebook posts from her Vietnam trip last year in which she met artisans that taught me about the organization’s mission.  (I also wrote about them previously in The Hook‘s last Green Homes issue.)
No, what I want to talk about here today is this recipe I stumbled upon in “More with Less” that is quickly becoming a favorite.   I first found it when I was looking for something easy and different to do with lamb for Pat’s birthday dinner.  He & Edie are fans of lamb, me, not so much, so I only cook it upon request.  I found a recipe for “Basic Meat Curry” that is truly was basic, with lamb as an option. Also listed as options were chicken, beef, mutton, fish, any leftover cooked meat or meatballs. I made it with lamb for Pat’s birthday and then again recently with tofu.
I love a good recipe that can be varied endlessly.  Not every recipe in this cookbook is so pliable, but it is a very good basic how-to cookbook that you can use for spin-offs.  I have what I call a “Rule of Three” – I use it in buying magazines as well as culling my cookbook collection – where a cookbook must have a minimum of 3 recipes in order to keep it’s spot on my shelf.  This cookbook definitely meets that self imposed standard.  Betty was right when she said we needed this around.
Tofu was on sale at the grocery store last week.  Normally I prefer Twin Oaks Tofu, that locally made goodness, but at 99 cents a block, I thought I’d try the grocery store stuff.  No, it does not touch Twin Oaks, but not everyone has access to Twin Oaks and when friends in other areas ask me about cooking with tofu, I want to be able to tell them how to make it and make it well.  Cooking with tofu is challenging.  I’ve been attempting to cook with it for 20 years and feel like I have just gotten the hang of it.  Most of that I attribute to good tofu, but there has been quite a bit of trial and error I assure you.  Boiling tofu for 10 minutes before you do anything else with it is a good place to start in getting it to stay firm and absorb flavors more readily.
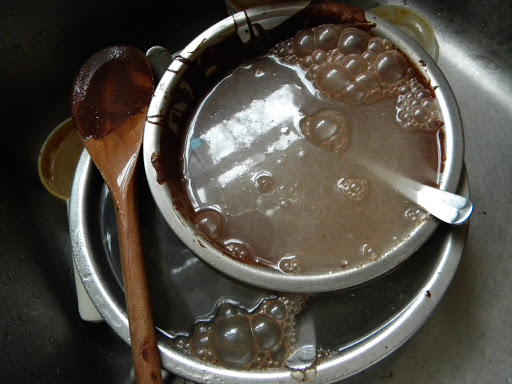
I thought I’d try some of this tofu in the basic curry that was so good with lamb.  As it simmers for several hours, I suspected that would be enough time for the tofu to absorb some of the curry flavor and it did. I also threw some vegetables in there so it would be a well rounded mostly one pot meal served over rice. I do love a one pot meal, probably more than my dishwasher does, for it means I don’t have to bother with the synchronization of things coming off the stove at the same time.  I am a lazy cook.
Basic Fill-in-the-Blank Curry
Heat in skillet:

2 T fat or oil

Saute in oil:
Chopped onion
Minced Garlic
Blend in small bowl:
2 T. lemon juice or vinegar
2-4 T curry powder
Stir curry mixture into onions and fry lightly for 2 minutes.  You can add additional spices (suggested are cardamom, cloves, cinnamon, coriander, turmeric, ginger, cumin, cayenne). 
Add your meat or tofu.  Suggested are:
chicken, cut into small pieces
beef or mutton, cut into 1″ chunks
fish, cut into chunks
Any leftover cooked diced meat
browned meatballs
cubed tofu (try boiling it for 10 minutes before hand)
Stir-fry briefly to coat meat with spices.  Add:
1 cup tomato juice OR 1 cup chopped tomatoes
1 t. salt
1-2 cups broth or water
Bring to a boil, reduce heat, cover and simmer for 2-3 hours for beef & mutton, 1 1/2 hours for chicken, 20 minutes for fish and cooked meats.  Add more liquid as needed for cooking to thin stew consistency.  (I cooked the tofu for 2 hours, but you could simmer it for just a short while and still have a tasty dish.)  Serve with rice.
Suggested vegetable additions include cubed potatoes (give them at least 20 minutes to cook), cabbage, green beans, peppers, carrots, spinach and peas.

Goodness.

Did you ever make something so good that not only could you barely believe you made it with your own two hands, but you wanted to shout about from every rooftop and share it with everyone you knew?

I’m having one of those moments.  In fact, I’m sitting here eating it and realized I just could not wait to blog about it.  Which means I also didn’t bother with trying to take pretty pictures. 

But we’ve discussed my photo laziness before.  How I’d be a great food blogger if only I put more effort into my photos.  But I’m an A minus type personality, which means I just fall slightly short of having everything perfect and I’m really okay with that.  The buns looks fabulous, they taste even better and what you need to do is to just make them yourself already.

I stumbled upon this recipe on Pinterest yesterday and couldn’t wait to try it.  Lemon Cheesecake Morning Buns.  If that doesn’t sound like a cure for winter short of flying somewhere tropical, I don’t know what does.  We are certainly ready for winter to be over with here.  I’m itching to dig and feel the dirt between my fingers, Pat’s ready to fish and Edie is just ready to not be in the house with us.

The last time I followed a dough recipe from the internet, it was a fail.  But everything about the recipe for this dough looked like it might work.  And, fingers crossed in the back of my head, if it was a good dough recipe, perhaps it could be my new Christmas morning cinnamon bun dough recipe.  I’m here to tell you, it’s good. And it will be my new Christmas morning cinnamon bun dough recipe.  I can’t tell you how relieved I am that I got that one right on the first try- I love sticky buns as much as the next person, but certain parts of my anatomy were not thrilled to hear we had were going to be sampling recipes for the next year.  The parts that tend to show I’ve been eating sticky buns for breakfast on a regular basis.

A few notes on the recipe – which I mostly followed.  I subbed some spelt flour for white flour and used buttermilk instead of the called for milk with vinegar mix. I also ignored the pan advice, reaching for a cake pan that was not big enough (despite my better half standing there telling me the pan wasn’t big enough) so that I could have that nice round pan of buns.  Not all of them fit in that pan, which meant I baked two pans this morning (there’s a third in the freezer, as I split the batch in half.  I don’t need all those buns lying around and I do love having something I can just pull out of the freezer.) and explains the first picture of the 3 buns in their own pan.  The top of the buns on the upper rack of my oven got a little brown, although they were only there for 25 minutes.  They tasted just fine though (and I’ll see if my dear husband won’t mind recalibrating my oven for me today). 

The dough was absolutely dreamy to roll out.  I can’t remember last time a dough was so easy to work with. The end result is a pastry just as dreamy – light and fluffy with lemony cheesecake filling.  I think these might even be good without the glaze. Something to try with the batch in the freezer for sure.

Valentine’s treats that are so easy you almost can’t stand it.

I love Valentine’s Day.  Not that I love the commercialization of  it – I hate the commercialization of everything.  But as I like to blog here every year, Valentine’s Day marks the start of this family and so therefore, it must be noted in some fashion.  Nothing big and splashy of course – just a wee something.  Keeping with my love of handmade gifts, I started making these treats for my valentines a few years ago.   They are quick, easy and yummy – my holy trinity.
The original recipe came from a post on Design*Sponge, but I’ve altered it over the years to be the one I’m about to share with you, so I’m not linking to the original.  If you can melt chocolate, you can make these.  They are that easy.
A few notes – I use good dark chocolate and natural peanut butter.  The original recipe calls for crushed graham crackers and salt to be added to the peanut butter mix, but I find it’s not necessary.  I make them in mini-muffin tins, as I find a full size muffin tin peanut butter cup to be a little too much.
Chocolate Peanut Butter Cups
2 bars (4 oz each) good chocolate 
3/4 cup peanut butter
3/8 cup powdered sugar, sifted
Melt a bar of chocolate in a double boiler (or use the microwave method of melting chocolate which means putting your chocolate in a bowl, letting it go for 30 seconds, stir and if needed, pop back in for another 15-30 seconds.)
Using a spoon, spread melted chocolate on the bottom and sides of paper muffin liners.  Coat them generously – this is the bottom and sides of your candies.  
Chill in fridge for 10-20 minutes or until hardened.
Combine peanut butter with sugar.  Melt remaining chocolate.
Place peanut butter in each muffin cup.  I like to spread it out a bit with the back of a spoon.  Dollop melted chocolate on top of the peanut butter, using a spoon to smooth out the tops.  Refrigerate for about a half hour or until fully hardened.
Sometimes I get jiggy with it and sprinkle sea salt on top.  Today I used bamboo salt. Because it was the first jar I grabbed when I opened the spice cabinet, that’s why. 

This is what is left to clean up.  If you can melt chocolate, you can make these.  And your valentines will thank you for them.
Yield:  24 mini muffin size peanut butter cups

Pecan Pie.

Being the slack food blogger that I am, I have no step-by-step shots of how I prepared my pecan pie last week.  Then again, the fact that I am sharing my pecan pie recipe the week after Thanksgiving is telling too, isn’t it?  It’s still good for Christmas though, right?  I mean, certain members of our household have asked if we can have another one sometime soon. 
I did not grow up eating pecan pie.  I’m not a big fan of cooking with nuts, so the idea of a pie devoted to them left me scratching my head.  It wasn’t until I met my better half that I realized that pecan pie is more about butter and sugar than nuts.  And certainly I can get behind anything that combines butter and sugar. 
The recipe I make is one that I got from a friend of Pat’s folks.  It’s pretty much the best damn pecan pie recipe in the world and the only one you will ever need to make. 
I’m such a slack food blogger that I didn’t even get a decent shot of my finished pie – this one is one Edie took with her father’s iphone, a little after the fact.  I tried making the crust edges all fancy, showing off the skills I picked up when I assisted in that pie baking class last summer, only to realize as I was pouring the filling into the pie crust that I had prepared a filling for a much bigger pie plate than I was using.  Whoops! I managed to fix it somewhat, but it wasn’t entirely pretty.  I ended up pouring what was left of the filling into a ramekin, baking that and we ate that hot out of the oven, giving us that pecan pie fix the night before Thanksgiving.
Enough with my issues, here’s the recipe.  Make it.  You’ll like it. 
Pecan Pie
1 stick butter
1 cup sugar
3/4 cup White Karo syrup
3 eggs
1 1/2 cups pecans
1/2 teaspoon vanilla
1/8 teaspoon salt
Combine first three ingredients in a pot and bring to a boil.
Beat eggs in a separate bowl.  Pour a small amount of hot liquid into the eggs, beat and then add the remaining hot mixture.  Stir in the remaining ingredients and pour into prepared pie plate.  Bake at 375 for 30-40 minutes.

They can turn your day right back around.

Yesterday was day  4 of no voice and day 9 of this cold, which seemingly gets worse every day it lingers.  The sun was shining and from inside, it looked like a beautiful fall day.  In reality, temperatures lingered in the 40’s.  It was one of those days where I knew when I got out of bed was yet another one of our marathon days, where it’s go-go-go until bedtime, but I had neither the energy nor the inclination to hurl myself through the way I generally can.  It was the kind of day where I ended up with enchilada sauce all over the inside of my purse in a most unexplainable manner, other than, I’m Becky and things like this regularly happen to me.

There was no outsourcing, as Pat was at a conference and I’d already ‘taken it easy’ the better part of the last 9 days.  No, it was time to just pull up my big girl pants and get on with it already.  That’s just how life is sometimes.

The last agenda item for the day before calling it quits was Bingo Night at school, something Edie was very much looking forward to. When we first arrived, my daughter got her bingo card, her plate of pizza and proceeded to find herself a spot at a table full of 10 year old girls, giving me a look that pretty much said, ‘You’re on your own Mom’.  Yeh, that day just kept on trucking….

Truth be told, I like bingo because I always seem to win. Which I did last night.  And Edie pretty much beat me to the table in the front to claim my bingo prize, suddenly deciding I was worth acknowledging again now that I was a winner.  There weren’t really any good adult prizes, so I didn’t mind.  When I would visit my Granny in the nursing home and play bingo with her, I always let her claim my prizes – it’s the thrill of the win for me, not the goodies.

Winning definitely helped turn the day around, but you know what really did it?  This delightful treat called a cookies and cream bar that was part of the bake sale.  After convincing two children that were not my own to share theirs with me as well as one of their parents, I finally got up and bought my own.  It was an oreo cookie version of a rice krispie treat. Despite her pretending I wasn’t with her, I did stop and give some to my child, mostly so that she could help me figure out the recipe, which turned out wasn’t necessary, because the recipe was making the rounds of parent conversation.  When I got home, the original blog link was emailed to me, which I’m sharing right there with you all, because it’s worth sharing just as much as the simple no-bake recipe.  These are perfect for the next bake sale you are expected to bring something to and bonus, there’s no baking.  I’m pretty sure you don’t want to make these and just have them around, as they won’t last long – they are definitely better in a sharing environment, unless of course you want to eat the entire pan.  I babbled about these on Facebook last night and someone suggested trying it with homemade marshmellows, but as I said there, I’m not sure you’d want to touch the junk food integrity of these with something wholesome like a homemade marshmellow, but hey, go for it if you want to.  Personally, if I’m going to eat junk food, I’m going all in.

Also discussed on that Facebook thread was my mad skillz in being able to get two children not my own AND a parent to share their candy with me.  I’d like to think that even on an off day I’m that good, but mostly I think there is something about those bars that’s so good and so unhealthy that you just feel the need to share.  Try them and see.

 No bake cookies & cream bars.

When in doubt, look to the 1950’s.

Last night’s dinner was leftover split pea soup. I needed to round it out with something and I knew some sort of bread was the answer.  We’ve already had sourdough baguette a few days this week, including with the first round of split pea soup, so something else was called for.  I’d spent the afternoon making and canning applesauce,  I didn’t feel like running out and grabbing something, I didn’t feel like putting effort into making something, I wanted something quick, easy and instantly gratifying.  What I really wanted was some Bisquick drop biscuits, but I was out of Bisquick.  Some quick research showed me that even if I whipped up a homemade style Bisquick, you are still required to cut the fat into the dry ingredients and that’s exactly what I wanted to avoid.  If I felt like doing that, I’d make biscuits already.

I reached for my 1956  Betty Crocker Picture Cook Book.  I felt for sure if any of the cookbooks on my shelf had a quick & easy drop biscuit recipe, it would be that one.   It’s chock full of tips on how to be a good housewife including reminders to be pleasant and have something interesting to relay to the family at dinner, so it seemed it would come through with a recipe that required little effort, because it also is full of reminders that the lady of the house should also take time for herself.  It did not disappoint.

The recipe says to sift together your dry ingredients, then pour all your liquids in at once, stir until the dough is a ball and there you go.  It seemed too easy to be true.  It wasn’t. It really was that simple.  As you stir, the dough becomes a ball.  Really.  And they were good.

How stinking happy am I that I found a quick & easy biscuit recipe that’s not Bisquick?  Admittedly, I have a soft spot for the mix seeing how it was my Granny’s secret recipe for just about anything, as long as the recipe was printed on the box.  It’s not whole grain and I’ve yet to find another baking mix that is as versatile as Bisquick that is whole grain (although I’ve been known to throw some wheat germ into pancakes made with it, just to feel like I’m healthing it up), but otherwise, it is one of two processed foods I tend to make room for in my pantry (the other being Kraft Mac & Cheese).

Because of my thing about using more whole grain flours when I bake and my current experimentation with spelt flour, I subbed a cup of that for all purpose flour.  I also threw in some fresh herbs – parsley, sage, rosemary, thyme and oregano- which I chopped finely and threw in with my dry ingredients.  You can roll them out or drop them, as I did.  If you can turn on an oven, you can make these.  They are that easy.

Stir and Roll Biscuits 
(From the Betty Crocker 1956 Picture Cook Book)

Sift (or whisk) together:
2 cups flour
3 tsp baking powder
1 tsp salt

Pour into measuring cup (but don’t stir together):
1/3 cup cooking (salad) oil
2/3 cup milk

Then pour all at once into the flour.
Stir with a fork until mixture cleans sides of bowl and rounds up into a ball.  
For rolled or patted biscuits, smooth by kneading about ten times without additional flour.  With the dough on waxed paper, press out 1/4″ to 1/2″ thick with hands or roll out.  Cut with unfloured biscuit cutter.  Place on ungreased baking sheet and bake until golden brown.

For drop biscuits, skip the kneading and drop from spoon onto ungreased baking sheet.

Bake at 475 for 10-12 minutes.

Buttermilk version:
Reduce baking powder to 2 tsp and add 1/4 tsp. baking soda.
Use 2/3 cup buttermilk in place of sweet milk.
Makes 16 biscuits.

And finishing with Vegetable Soup.

In last week’s split pea soup post, I misquoted Cynthia and promised her I’d correct it.  She was talking about vegetable soup and not split pea soup with the addition of dill and sour cream (although it does sound good for split pea soup too and I’m totally trying that my next batch).  Clearly I got confused in the 50+ comments that post generated over on facebook.  Today is one of those grey, rainy fall days that practically begs for a pot of vegetable soup simmering on the stove all day, so I thought we’d talk vegetable soup, shall we?

My vegetable soup, just plain veggies, is never the same twice.  I usually refer to my vegetable soup as ‘clean out the fridge’ soup, sometimes ‘clean out the freezer’ soup.  It starts the same way, by sauteing onions ( and/or carrots, peppers, celery, garlic) in the oil (or half cup of broth) of your choice, then adding liquid such as broth, tomatoes as well as a variety of vegetables.  Potatoes are good.  Sweet potatoes can be a fun addition too.  Beans of any sort, corn, squash, greens (kale, swiss chard, arugula, cabbage), just about any vegetable you have on hand, even leftover ones, can be thrown in the pot.  Some days it’s leftover rice, others it’s barley.  Or I’ll add uncooked rice and/or barley early in the simmering process and let it cook.  Pasta is always a nice addition, but I like to cook it on the side and add it to the serving bowl to avoid it soaking up all the moisture in the soup and becoming soggy.

Let’s talk broth for a minute, shall we?  You can use just plain water when you make a soup, as long as you add plenty of good spices and/or combine it with tomatoes.  Using broth will deepen the flavor.  I know there are some that swear by homemade broth, but not everyone has time nor freezer space for it.  I keep dried broth powder from the natural foods store in my spice cabinet as well as a paste product in the fridge that has a much richer flavor than any bullion that I will throw in for extra richness.  I’ve also found that whipping up a quick vegetable or seafood broth is quite easy, it just takes a little bit extra time.  As I prep my veggies, particularly my onions, garlic, carrots, etc, I will throw the peels and ends into a pot of salted water with a bay leaf.  Simmer it for about a half hour or more, strain and there you have it, quick & easy vegetable broth.

Now for the seasoning.  Some days I’ll throw in some pesto from the freezer, other days chili powder or even curry.  Cynthia had a batch that she had added dill to and garnished it with sour cream.   We’re big fans of grated cheese on top of our soup here as well.  You can use soy sauce, tamari or even miso. I spent years trying to figure out how to melt miso paste into soup without bringing it to a boil and killing off the all good bacteria in miso, when it dawned on me one day to borrow the trick cooks use in incorporating corn starch into sauces – adding broth from the soup to the miso in a small bowl or cup, stirring until combined, and then stirring it into the pot.  Success every time.

Bread, of any sort, seems to be the classic soup accompaniment, because let’s face it, nothing takes the chill off a day like today better than a nice pot of soup simmering on the stove while a loaf of bread bakes in the oven.  Or a batch of biscuits.  Or corn muffins.  Or a baguette you picked up at the store that you warm up in the oven. But really, that’s an entirely different post.