They can turn your day right back around.

Yesterday was day  4 of no voice and day 9 of this cold, which seemingly gets worse every day it lingers.  The sun was shining and from inside, it looked like a beautiful fall day.  In reality, temperatures lingered in the 40’s.  It was one of those days where I knew when I got out of bed was yet another one of our marathon days, where it’s go-go-go until bedtime, but I had neither the energy nor the inclination to hurl myself through the way I generally can.  It was the kind of day where I ended up with enchilada sauce all over the inside of my purse in a most unexplainable manner, other than, I’m Becky and things like this regularly happen to me.

There was no outsourcing, as Pat was at a conference and I’d already ‘taken it easy’ the better part of the last 9 days.  No, it was time to just pull up my big girl pants and get on with it already.  That’s just how life is sometimes.

The last agenda item for the day before calling it quits was Bingo Night at school, something Edie was very much looking forward to. When we first arrived, my daughter got her bingo card, her plate of pizza and proceeded to find herself a spot at a table full of 10 year old girls, giving me a look that pretty much said, ‘You’re on your own Mom’.  Yeh, that day just kept on trucking….

Truth be told, I like bingo because I always seem to win. Which I did last night.  And Edie pretty much beat me to the table in the front to claim my bingo prize, suddenly deciding I was worth acknowledging again now that I was a winner.  There weren’t really any good adult prizes, so I didn’t mind.  When I would visit my Granny in the nursing home and play bingo with her, I always let her claim my prizes – it’s the thrill of the win for me, not the goodies.

Winning definitely helped turn the day around, but you know what really did it?  This delightful treat called a cookies and cream bar that was part of the bake sale.  After convincing two children that were not my own to share theirs with me as well as one of their parents, I finally got up and bought my own.  It was an oreo cookie version of a rice krispie treat. Despite her pretending I wasn’t with her, I did stop and give some to my child, mostly so that she could help me figure out the recipe, which turned out wasn’t necessary, because the recipe was making the rounds of parent conversation.  When I got home, the original blog link was emailed to me, which I’m sharing right there with you all, because it’s worth sharing just as much as the simple no-bake recipe.  These are perfect for the next bake sale you are expected to bring something to and bonus, there’s no baking.  I’m pretty sure you don’t want to make these and just have them around, as they won’t last long – they are definitely better in a sharing environment, unless of course you want to eat the entire pan.  I babbled about these on Facebook last night and someone suggested trying it with homemade marshmellows, but as I said there, I’m not sure you’d want to touch the junk food integrity of these with something wholesome like a homemade marshmellow, but hey, go for it if you want to.  Personally, if I’m going to eat junk food, I’m going all in.

Also discussed on that Facebook thread was my mad skillz in being able to get two children not my own AND a parent to share their candy with me.  I’d like to think that even on an off day I’m that good, but mostly I think there is something about those bars that’s so good and so unhealthy that you just feel the need to share.  Try them and see.

 No bake cookies & cream bars.

When in doubt, look to the 1950’s.

Last night’s dinner was leftover split pea soup. I needed to round it out with something and I knew some sort of bread was the answer.  We’ve already had sourdough baguette a few days this week, including with the first round of split pea soup, so something else was called for.  I’d spent the afternoon making and canning applesauce,  I didn’t feel like running out and grabbing something, I didn’t feel like putting effort into making something, I wanted something quick, easy and instantly gratifying.  What I really wanted was some Bisquick drop biscuits, but I was out of Bisquick.  Some quick research showed me that even if I whipped up a homemade style Bisquick, you are still required to cut the fat into the dry ingredients and that’s exactly what I wanted to avoid.  If I felt like doing that, I’d make biscuits already.

I reached for my 1956  Betty Crocker Picture Cook Book.  I felt for sure if any of the cookbooks on my shelf had a quick & easy drop biscuit recipe, it would be that one.   It’s chock full of tips on how to be a good housewife including reminders to be pleasant and have something interesting to relay to the family at dinner, so it seemed it would come through with a recipe that required little effort, because it also is full of reminders that the lady of the house should also take time for herself.  It did not disappoint.

The recipe says to sift together your dry ingredients, then pour all your liquids in at once, stir until the dough is a ball and there you go.  It seemed too easy to be true.  It wasn’t. It really was that simple.  As you stir, the dough becomes a ball.  Really.  And they were good.

How stinking happy am I that I found a quick & easy biscuit recipe that’s not Bisquick?  Admittedly, I have a soft spot for the mix seeing how it was my Granny’s secret recipe for just about anything, as long as the recipe was printed on the box.  It’s not whole grain and I’ve yet to find another baking mix that is as versatile as Bisquick that is whole grain (although I’ve been known to throw some wheat germ into pancakes made with it, just to feel like I’m healthing it up), but otherwise, it is one of two processed foods I tend to make room for in my pantry (the other being Kraft Mac & Cheese).

Because of my thing about using more whole grain flours when I bake and my current experimentation with spelt flour, I subbed a cup of that for all purpose flour.  I also threw in some fresh herbs – parsley, sage, rosemary, thyme and oregano- which I chopped finely and threw in with my dry ingredients.  You can roll them out or drop them, as I did.  If you can turn on an oven, you can make these.  They are that easy.

Stir and Roll Biscuits 
(From the Betty Crocker 1956 Picture Cook Book)

Sift (or whisk) together:
2 cups flour
3 tsp baking powder
1 tsp salt

Pour into measuring cup (but don’t stir together):
1/3 cup cooking (salad) oil
2/3 cup milk

Then pour all at once into the flour.
Stir with a fork until mixture cleans sides of bowl and rounds up into a ball.  
For rolled or patted biscuits, smooth by kneading about ten times without additional flour.  With the dough on waxed paper, press out 1/4″ to 1/2″ thick with hands or roll out.  Cut with unfloured biscuit cutter.  Place on ungreased baking sheet and bake until golden brown.

For drop biscuits, skip the kneading and drop from spoon onto ungreased baking sheet.

Bake at 475 for 10-12 minutes.

Buttermilk version:
Reduce baking powder to 2 tsp and add 1/4 tsp. baking soda.
Use 2/3 cup buttermilk in place of sweet milk.
Makes 16 biscuits.

More on biscuits, plus a salad.

That long weekend in which I perfected pizza crust, sourdough bread AND the biscuit?
Well it turns out that even if you do work out 5 days a week and can eat your weight in carbs thanks to your good Irish genes, a massive overdose on white flour where one eats the better part of a pizza one day followed by at least an entire loaf of sourdough baguette a few days later and follows that up with 4 biscuits at dinner the next night with 2 for breakfast the morning after over a 5 day span will result in a muffin top just like your girlfriends warned you about once you are at a certain age, which apparently I now am.
So, after hitting the gym hard and watching my carb intake, especially my not-quite-entirely-healthy carb intake and getting that waistband on my jeans to fit like it should, I was ready to get back on that biscuit project.  As I stated in my last post about biscuits, I want to come up with a whole grain biscuit that is light, fluffy, tasty AND easy on my waist line no matter how many I eat in one sitting.  I’ve spent serious time reading and talking with my other foodie friends about types of flour and fat and had a few ideas I wanted to try out.
I also acquired an assistant in my mission.
After watching countless hours of Julia Child and Jacques Pepin, along with a little bit of bow tie guy that she won’t admit to watching (She claims to not like him and last week’s profile in New York Times Magazine with the title “Cooking Isn’t Creative and It Isn’t Easy” sent her on a good 20 minute tirade of how that’s exactly why she cannot. stand. him.) on PBS’s Create channel, my girl decided she wanted in on the great biscuit project.
So, I measured out the flour proportions I wanted to try and she took over, with a small assist from me on working in the butter.
The recipe we used calls for 3 cups of flour.  We did one cup whole wheat, one and a half cups all purpose flour and a half cup cake flour.  For the fat, we did equal parts lard and butter.  We cut the lard in first and the butter second.
The biscuits themselves were light and slightly crumbly.  I think the flour mixture was spot on.  I want to play around the amount of lard – I think next time we’ll do a quarter lard and three quarters butter.  I also will cut the butter, or at least most of it, in first, as the lard is ridiculously easy to cut in.
I’ve now tried lard in both a pie crust and a batch of biscuits.  It does make your pastry incredibly flaky, but it also imparts a certain animal taste.  I like it in the chicken pot pie, but not so much in biscuits.  Toasted for breakfast, smothered in butter and Grandma Kathy’s blackberry jam I didn’t notice the flavor as much, admittedly.  But I also am not that much of a fan of meat or the taste of it in general.  I like bacon and sausage, but I mostly prefer the smoky flavor and the spices involved more than anything else. Although the flavor, combined with the larger size biscuits Edie cut out definitely kept me to eating just two biscuits with my soup and salad.
The salad is worth mentioning.  We had some goat’s milk brie and some toasted pecans that she thought would pair wonderfully with dried cranberries and the arugula I always seem to have on hand and work into dinner a few nights a week.  Only we didn’t have any dried cranberries on hand.  What we did have though, was some cranberry spread I’d made last year.  I proposed the idea of using it as a basis for a dressing.  So, down we went to the shelves in the basement where all things canned, pickled and jammed are kept and grabbed a jar.  We thinned it with olive oil, lemon juice, honey and water until it was just the right consistency, then tossed it with the greens, cheese and nuts.
It was a darn good salad.  And she did a most excellent job on the biscuits too.  Definitely some proud mama moments as I watched my little foodie go to work in the kitchen last night.
As for the dressing,  I think the liquid proportions with the exception of the honey ended up being equal.  Using a fruit spread (or jam) as the basis of a salad dressing seemed pretty genius to me and I’m now brainstorming ways of using up my stash on the shelves down there.  At some point I might measure things and write out a real recipe to share, although I definitely will be making a batch of cranberry spread again this year and if you like cranberries, I recommend you make some too.  It’s easy and oh so good.
Reminder – the cookbook giveaway is still open, so get on over there and enter before this Thursday, October 25.

Biscuit theory.

I have long held the theory that if I just found the right biscuit recipe, I would be able to make flaky, delectable biscuits that my family would rave about.  Over the years, I have sworn by this recipe and then that one.  Among my cookbook collection, I have dozens upon dozens of biscuit recipes – my Southern Living Southern Heritage series alone has 95 recipes scattered throughout its eighteen volumes.  The “Bread” volume alone has an entire chapter on biscuits, with subsections on beaten biscuits (5 recipes, including Maryland and Kentucky style beaten biscuits), yeast biscuits, basic biscuits (17 recipes, including 3 with ‘buttermilk’ in the name), as well as biscuits suitable to be served with tea. Both the beaten biscuit as well as the basic biscuit section feature picture tutorials with step by step how-to instructions.
It’s not entirely about the recipe though, it’s about the ingredients and technique of putting those ingredients together.  While many of the recipes I have call for all-purpose flour, one could assume all flour is the same, when in fact, all purpose flour differs from  region to region.  Southern all purpose flour is made with soft red winter wheat, which has a lower protein and gluten content than what is available in other regions of the country.
I first learned this in conversations with my friend Mark down at city market this summer.  He often sets up a stand, handing out samples and recipes of dishes made with local produce.  We share similar interests in food and when he’s down there, I find myself engaged in conversations with him and other foodie types, discussing things like pickles and grits and curing your own meats and yes, flours.  Turns out that while I was reading Game of Thrones on my summer vacation, Mark was reading about biscuits.  Three books worth in fact.
As a baker, I knew the importance of different flours – high gluten flour for pizza crusts that resemble the ones your favorite local pizza place makes,  Cake flour for lightly textured cakes, pastry flour, whole wheat flour, rye flour, buckwheat flour and more, including just plain old bleached & unbleached all purpose flour, but even I did not know that flour was different from region to region, brand name to brand name.
Interestingly enough, my older (1946 & 1964) copies of The Joy of Cooking both call for cake flour in their biscuit recipes, saying that it will make for a lighter biscuit.  Nowhere else have I seen a peep about how the flour you use is a large factor in making your biscuits light and fluffy.
There are differing opinions on how much to handle the dough, whether to knead or not, some say to roll it out, others say to keep the rolling pin far away from the biscuits.  Beaten biscuits, which apparently are unbelievably light and fluffy are made by literally beating the biscuits for a good 20 minutes or until the dough starts to ‘blister’ and pop.
With it being soup season, that means it’s biscuit season too.  I made my first batch of biscuits the other night,  using a technique I picked up from Rachel’s pie class I assisted with this past summer.  She cuts her fat in in stages, handling the final crust as little as possible. This, combined with using a southern flour (which took visiting a few grocery stores, believe it or not, despite the fact that I live in Virginia, which is considered the home of the ham biscuit), resulted in what I think is hands down my best biscuit ever.
They were everything you want a biscuit to be – light and flaky, excellent with butter and some blackberry jam for breakfast the next morning too. I think I have finally figured out the secret to a good biscuit – it’s not necessarily the recipe, it’s the flour you use and how you put them together.  Really, so much to cooking is about the ingredients you use as well as techniques.
Here’s my next goal – to figure out how to make a biscuit using whole wheat flour that is just as flaky and light as a biscuit that’s made of nothing but white flour.  I know that whole grains are healthier for us and since a big part of my motivation in my food sourcing and cooking is so that my family eats healthy, nutritious food, I’m not comfortable with us eating home baked goods on a regular basis that only use white flour, especially the lighter versions with less nutrients.  I have a few ideas about how I want to go about developing my own flour mixes, namely I’m going to try mixing some cake flour with some whole wheat flours and seeing what those results are.  I’ve also gotten my hands on some lard, not from the grocery store, but from animals that have been raised humanely, not commercially.  I’ve read good things about cooking with lard and I want to see for myself how they work in my biscuits and pie crusts.

You are what you eat.  Which is why I spend so much time thinking about biscuits, clearly.

Catching up.

Since I last visited this space, we have had a few adventures.
Going to pick up Edie from camp was the first.
After last year’s camp closing ceremonies, Edie announced that her goal for this year was to be recognized for archery at the closing ceremony.  Which she was.  Her face as her name was called for that was absolutely beaming.  She was quite proud of herself, as were we. Is there anything better than seeing the satisfaction of your child’s face when they hit a goal they set for themselves?  She was also recognized for Dance & Lacrosse.  She was surprised by the lacrosse recognition as she doesn’t care for the sport.  I told her she didn’t have to like it to be good at it, but wasn’t it nice to know that if she wanted to play it she’d be good at it?  She was only slightly sold. 
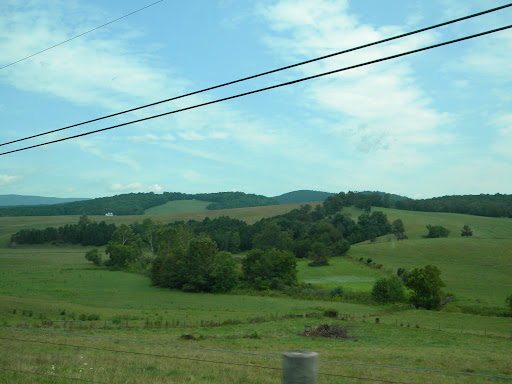
There was a dirt road involved on the way home.
We are fans of detours that include dirt roads, especially when they include ice cream as well, which this one did.
When we got home, I had her dump her trunk down the laundry chute so I could wash everything.  My basement smelled like someone had been bathing in a pond for 3 weeks and then left all her towels out in a rainstorm.  Which pretty much was her story.
While I was switching out the loads from the washer to the dryer Saturday night, I happened to glance over and see something wriggling in a spider web that didn’t look like it belonged there.
Turns out, it didn’t.  It was a baby Eastern Ringneck snake. The tiniest little snake you’ve ever seen.
Edie really wanted to keep it, but Pat wasn’t sure if it was eating the tiny worms we brought him/her.  Also, when all of Edie’s pals came by to see her the one day she was home between adventures, the little bug catcher the snake was in didn’t get properly closed and we woke up to find Ringo gone.
Hopefully it’s made it’s way out of my house.  But if it eats bugs, then hopefully it will stay out of my eyesight.
As soon as I got Edie’s camp laundry done and my basement smelling like a basement again (a big improvement over pond water believe it or not), we took off for our last family adventure of the summer.
We headed down to the Outer Banks of North Carolina to visit our friends the Dorbads.
19 month old Lincoln is cute as can be.  He also had a nasty cold he was more than generous with.  His poor mum came down with it while we were there and while Edie complained of a sore throat for a few days, I think I managed to zinc her up enough to head it off. 
I had totally forgotten that when you have a 19 month old, that’s pretty much all you do all day.
Although they are awfully cute and entertaining.
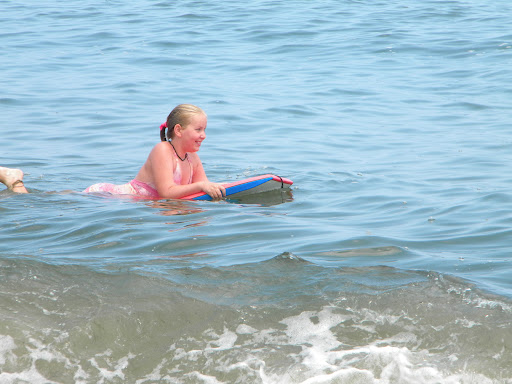
We had some great beach weather.  It was in the 80’s and thanks to some offshore winds, the water was ICE cold.  After sitting in the sun and ‘getting warm’ as my mother used to say, it was refreshing.
Also, how nice is it to get in the ocean in August and have goosebumps from the water temperature?

We wandered down to Jennette’s pier one day so Pat could fish. 
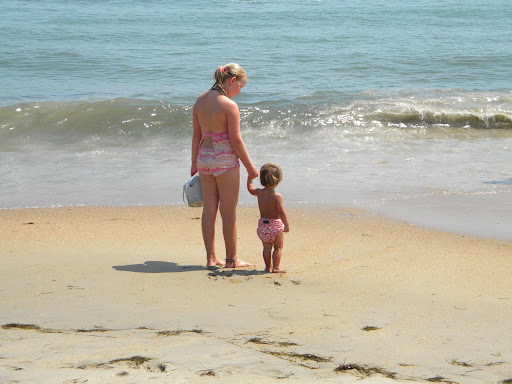
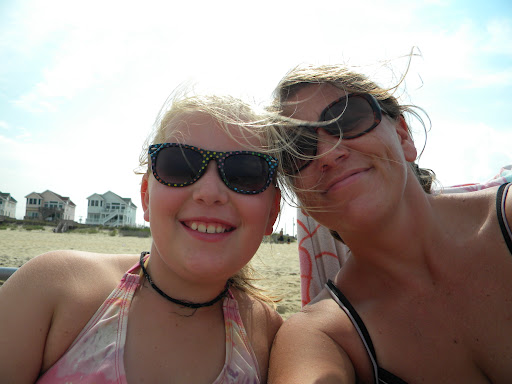
While he was up there on the pier, Edie girl & I sat on the beach nearby. We had a most fabulous chat over a coke (her) and a beer (me). 
Daddy got to fish, Edie got chocolate ice cream AND a coke and I got to sit on the beach and read not quite an entire book all day, which we all considered perfect. How to top a day like that?

By heading even farther south to Cape Hatteras National Seashore the next day.
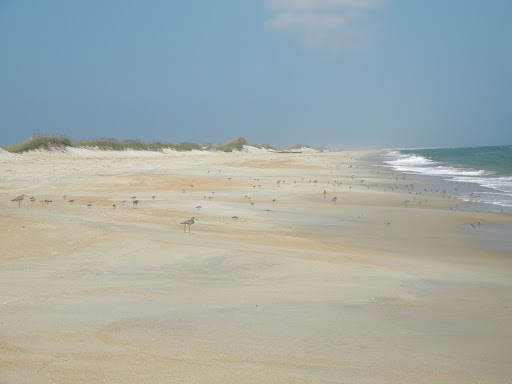
That was the view to the left of us down the beach. 
How sweet is that?  I adore Hattaras island and that particular stretch of coastline for just that reason.
The umbrella in the distance marked the set up of a young couple near us for the day.  It was so deserted she chose to sunbathe topless.  (One of us was horrified, one of us was amused and one of us thought good for her because I’d surely burn in a most unpleasant way in some uncomfortable spots if I did that.)
We went for a stroll to collect shells and to get away from all the people.

I couldn’t help but notice that Sandy McSandster, my daughter’s beach alter ego, lives on.
That child has some sort of magnetic attraction to sand.  When she was smaller and would come in from the beach completely coated in sand, I chalked it up to her being a baby, a toddler, three, four, etc.  But now she’s 10.  And still leaves a heavy trail.  I’m surprised there’s any sand left on Hatteras Island, because the inside of my car is completely coated, as is my beach bag, the cooler and I have no doubt her entire suitcase. 

At one point, we let her go into the cooler for something, where she proceeded to coat everything in there with sand as well.  Seriously.  One hand in to grab and everything after was coated.  That beer is fresh from the cooler, after she was in it. You should have seen the one she handed her father.  He took it into the ocean to clean it off. 

I guess she’ll never outgrow it.
Which is okay, because I happen to know 40-somethings that have similar traits.  She’s in most excellent company.

Despite the fact that my child coated everything in sight in sand and our hosts were under the weather, it was a great trip.  The day we spent at Hatteras was one of the most perfect beach days I’ve ever had.  It was 80, barely a cloud in the sky, the water temp and the breeze just right.  And I got to spend a day with those two with no outside distractions besides my book.  (I’ve been plowing through “Game of Thrones”, having watched the entire show the first week Edie was at camp, I picked up the books and am now on the fourth one.)
We spent the week without television and internet.  That was week two for me, unplugged and for Edie, week four.  (She was completely unplugged while at camp.).  It might be habit forming. 
We came back Friday afternoon.  Saturday I taught a pickling class for Market Central.

We pickled peaches, green beans and cucumbers.
It was a good class if I do say so myself.
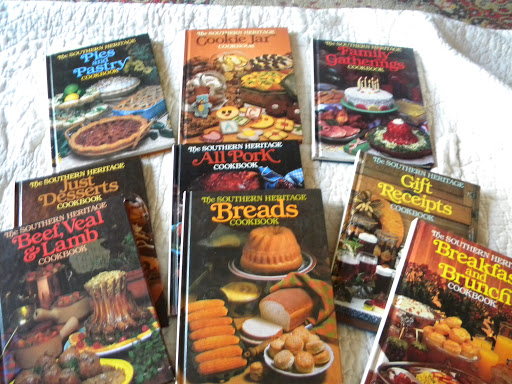
I had planned on using the Ball Pickling Mix that is all over the market this season for dill pickles.  However, due to a small oversight, there was no pickle mix on hand for the class.  A quick flip through the stack of canning & pickling cookbooks I had brought along and we selected a new one – from my trusty Food in Jars Cookbook.  We just so happened to have everything it called for on hand and so we went with it.
I’ll let you know how they turned out in a week or so when I open the jar I carried home.  I’ve yet to make anything out of that cookbook or from her websites that isn’t good, so I felt safe trying that out in a class, untested.
I do need to brag that I completely guesstimated on the amount of brine to make for those pickles and turns out my guesstimate was just enough.  Not only did I pull it out, I pulled it out perfectly.
I’m good like that.
I can’t say the same for the amount of peach brine I made, there were several quart jars left over that students took home with them.  No one seemed to be too upset about that, as the pickled peaches were a huge hit just on the smell alone and as I pointed out, when you have leftover brine, you can use it to do another batch.  I shared the recipe I came up with as a happy discovery to much rave reviews, which felt pretty darn tooting good as well.
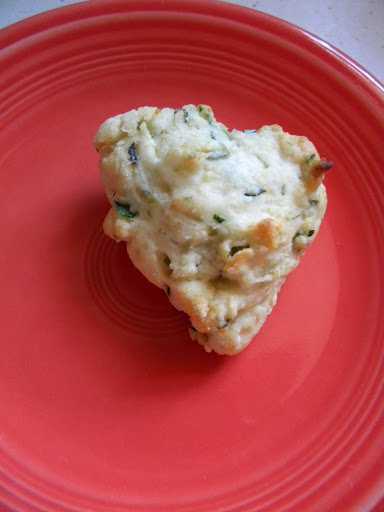
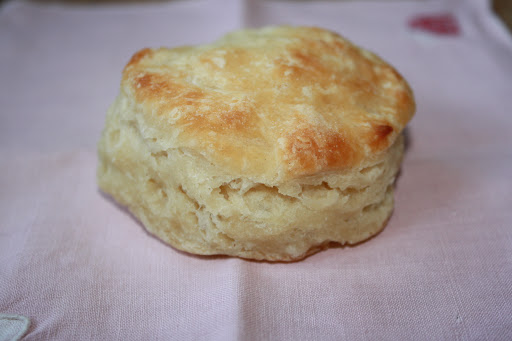
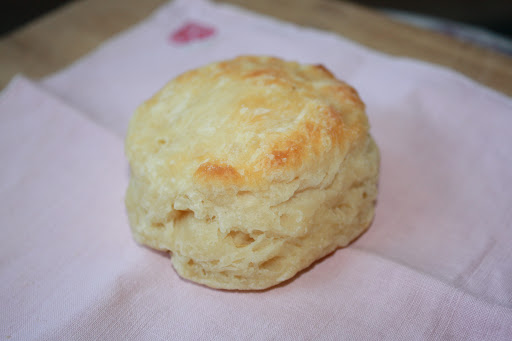
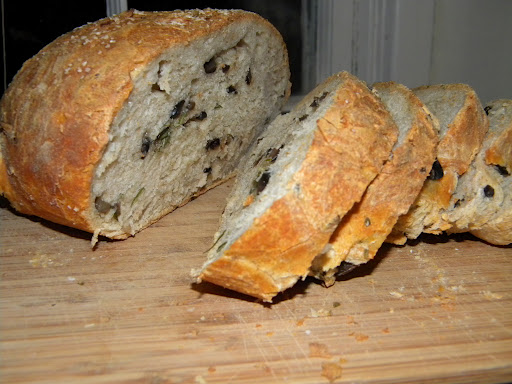
So now we are home for a good while – school starts Wednesday and we need to settle back into that routine.  The weather today – grey, drizzly and cool – was slightly conducive towards that end.  I cleaned out the fridge and found a forgotten jar of bread & butter brine, but I also happened to have a few cukes on hand and some jalapenos from the garden that I threw in, so there was a batch of pickles made today while I was baking bread with the sourdough starter Leni shared with me.  None of us have unpacked from the beach yet – heck, Edie still has bags sitting around with camp gear all over the house, thanks to the fact that she’s slept in her own bed exactly 2 nights since we picked her up over a week ago.  It’s good to have her home, it’s good to be home and it’s good to have a few more days to collect ourselves before it all starts back up again.

For the love of pie.

Rachel Willis taught a pie baking class at the Charlottesville Cooking School that I was lucky enough to assist with last Saturday morning.  I had assisted with her cake baking class last winter and knew she was amazing.  I knew she had won a pie baking contest last fall, so I was intrigued as to what her pie secrets were.  I consider my own pie skills fairly decent.  Granted, I can’t hold a candle to my mother’s pie making ability, but I have gotten to the point where I’m pretty convinced her skills are a gift that cannot be learned.

I learned from Rachel that while that might be partially true, there are skills that can be learned.   I’m just going to go ahead and gush about how amazing that class was.  I thought I knew a lot about baking a pie.  Holy Moly did I learn a lot about pie.  How to do a crust.  How to roll it out (okay, I knew that was my weakness). How to do a lattice top pie AND make it look easy.    Different thickeners for the filling. Different flavor additions.   I’m still sort of absorbing all the knowledge I took in.  I haven’t had time to bake a pie yet with my new knowledge, but I am definitely looking forward to apple pie season in ways I have never looked forward to apple pie season.  And I LOVE apple pie.  It is my chosen birthday dessert, as long as it’s homemade to my specifications.  (Different late harvest apples is key.)

So the class.  She had the students bring fruit to make their own pie – sort of Iron Chef of pie baking classes.  There were blueberries, apples, peaches & cherries.  (Some of which were combined).  She greeted the class with a rhubarb custard pie with some orange accents.  Even her experiments in pie are amazing.

She started by teaching us how to roll out the dough.

While she was at it, she demonstrated a lattice top pie.
And how incredibly easy they are to do.

I feel a lattice top pie kick coming on.

She had premade dough for everyone’s pies, of different varieties.  After preparing the filling for pie, everyone rolled out their selected crusts and got the pies in the oven.  The idea was that we’d sample the pies everyone baked.
Once the pies were in the oven, she demonstrated how to make a crust.
And then everyone got to make a crust to take home, as well as their remaing pie. 

She works half her fat in at one time, then works in the remaining half. That’s what the dough looks like once you’ve worked in the water and before you dump it into plastic wrap to let it sit and chill.  Totally different from how I do my crusts. 
Her crusts are so much more flakier than mine and now I know why.  It’s not just one reason, it’s several.
I wish I had more pictures but about this point in the class my camera battery died. I have no shots of the various blueberry, peach, cherry, apple & blueberry pies that came out.
We sampled them all and they were good.
I did however, get a shot of the chicken pot pie Rachel made for lunch. 
And that was pretty darn tooting amazing too.
Part of why I love assisting with classes at the cooking school is because of the knowledge I walk away with. This class was by far, the most informative class I’ve ever had there.  Rachel is a seriously superlative baker.  She knows what she’s doing and she can explain to you the how and why of certain tricks.
I was most impressed with how she had her class use glass baking dishes.  I swear by my aluminum ones, but she even has me rethinking the usage of glass dishes.   Rachel, you really should teach more baking classes.  I could definitely use some help with my cookies next. 

Pickled Peach Pie.

After taking exactly one bite of the pickled peaches I’d made last month, my little foodie Edie declared we needed a pie made of pickled peaches.  This weekend I accommodated that request.

That girl of mine is onto something.  Combined with ice cream (for dessert) and yogurt (for breakfast), pickled peach pie is the way to go, if you can stop yourself from eating the jar of pickled peaches.  After her first bite of pie, she informed me, we’re gonna need more of these, so I guess I’m going to head out this week and get another half bushel or so of peaches to pickle, because we have managed to eat almost half of the two batches I put up just a few weeks ago.

Pickled peaches have the consistency of canned peaches – that is, soft.  Where the pickling comes into play is the taste.  They have a bit of a tang to them from the vinegar, a bit of spice to them thanks to the ginger and cinnamon and the natural sweetness of a peach.  They are, as has been said around here, ‘dang good’.
I used the recipe from The Serious Eats website in pickling them.  The only variation I did to the recipe was to grate the ginger rather than slicing it.  As I noted in my post when I made them, I had a good bit of brine left over – enough to get at least double, if not triple what the original recipe called for. Which clearly, is a good thing.

I did a tutorial on making a pie crust a while back for our friend Bea who is living in England, but realized I didn’t include the recipe at the time (I had sent it to her previously), so to correct that, here’s my pie crust recipe.  It’s based on the recipe my mother handed down that I’ve tweaked slightly.

Pie Crust
(Yields 2 crusts for a 10″ pie pan)
2 cups whole wheat pastry flour (or a mix of white & whole wheat pastry flour)
1 tablespoon salt
1/4 cup sugar
3/4 cup butter (or crisco or lard or a blend of shortenings), cold.
6-7 tablespoons ice cold water with a dash of vanilla.
Cut butter or shortening into flour, salt & sugar until the mixture resembles fine crumbs.  Slowly add the water, a tablespoon at a time, until the dough just holds together.  (I find whole wheat flour needs more water than white flour.)
Let the dough rest in the refrigerator while preparing the filling.  Even just a few minutes helps when you roll it out.  The colder the dough is, the easier it is to roll out.   I roll out my pie crust between two layers of wax paper.  I pull one layer off, lay my crust down in the pan (or on top of the filling) and then gently peel the second layer off. 
To make pickled peach pie, I drained two and a half pint jars, tossed them with a sprinkle of sugar and about a 1/4 cup or so of flour, similar to the recipe for a regular peach pie.  I followed the baking instructions for standard peach pie – my method is to bake at 425 for 15 minutes, then turn the oven down to 350 for 35 minutes or so. 
A note about pie pans- I use only vintage Wear-Ever aluminum pans.  I have tried many different pie pans over the years and aluminium pans are the way to go.   It results in a much nicer bottom crust than any other pan and is what commercial bakeries use. 

A Cake AND A Pie.

In the midst of the craziness of the last week of school, a dear friend had her birthday. We got together to celebrate it Saturday night with dinner and drinks. I was asked to bring dessert, which I was more than happy to do, as she had made me a yummy chocolate cake for my birthday last fall and I wanted to return the favor. In addition to our two families were two others, with a kid count close to 10, so after some thought, I decided that the kids needed their own dessert. I realized that I wasn’t up for making two cakes, so when I woke up in the middle of the night with the genius idea of making a chocolate pudding pie for the girls, I was pretty proud of myself.  When I realized I could use my mac daddy cake carrier to transport my two desserts, I was even more proud of myself.  I used the stacking cupcake levels to hold the two desserts.  What I love best about that thing is that it collapses for storage, so while it can hold 24 cupcakes, two cakes or a cake and pie as the case may be, it doesn’t sit around taking up the space of two cakes.
 I made a chocolate pudding pie with a chocolate graham cracker crust for the kids.  I smashed a packet of chocolate graham crackers, sprinkled in a little bit of sugar, melted 6 tablespoons of butter, poured it on top and combined it all, then spread it out in the pie plate.  I chilled it briefly before pouring the pudding on top.
I used the chocolate pudding recipe from Wayne Harley Brachman’s Retro Desserts cookbook.  I’ve blogged about this cookbook before – it’s my go-to dessert cookbook. Not only does it have great recipes, it talks about techniques, which are really key to baking.   Homemade pudding is fairly easy and once you’ve had the homemade version, you will find it hard to eat the instant boxed version.  (I’m including it here at the end of the post.  Try it for yourself.)
I think the key to good pudding is using fresh, whole milk.  I use a local dairy, Homestead Creamery, who bottle their products in glass.  The difference in taste from any other dairy product you’ve ever had is something you just have to try for yourself. 

After the pie cooled for a few hours, I spread a layer of fresh whipped cream on top of the pudding, then garnished the pie with fresh cherries.
As for the grown-ups dessert a few weeks ago, I happened to notice an old Bon Appetit my birthday celebrating friend was getting rid of that had a picture of what looked to be an amazing chocolate cake on the cover.  I ended up ripping the recipe out and bringing it home. As I was looking for a cake to bake, I realized this cake was the perfect one to bring with us Saturday.
It’s from the September 2006 issue, La Bete Noire.  I have never ever made a cake with this much chocolate in it – just the cake calls for 18 ounces, with the ganache on top calling for another 8 ounces.  It’s a flourless cake, with the ingredients being butter, chocolate, eggs and a simple syrup.  I think what appealed to me the most was the fact that you left the cake in the springform pan you baked it in, then dumped the ganache on top, making sure it was evenly distributed and then let it chill for a few hours.  That is definitely my kind of frosting. 

I garnished this cake with dollops of whipped cream and blueberries from our bushes and served it with more whipped cream and berries.
A chorus of girls serenaded the birthday girl.  Once everyone tried the cake, it was agreed that chocolate pudding pie was a much better dessert for the girls.  “The Black Beast” was intense. And divine.  And actually pretty darn easy to make, which is key, because when you make a pie and a cake in the same day, you don’t want to spend the day slaving over them, especially when it’s close to 90 degrees outside.
I brought home the remnants of the chocolate pie as well as a little bit of the birthday cake, leaving the bulk of it for the birthday girl.  I think I have found a new go-to cake that will leave everyone impressed with my baking abilities, although honestly, it’s just an ability to read a recipe and know which ingredients to use.  You can never go wrong with 60% cacoa.  Ever.

Chocolate Pudding
from Retro Desserts
4 ounces bittersweet chocolate
2 tablespoons unsalted butter
2 tablespoons cornstarch
1/4 cup unsweetened Dutch-processed cocoa
1/2 cup sugar, divided
2 1/2 cups milk, divided
1 large egg
2 large egg yolks
Melt butter and chocolate.
Whisk the cornstarch, cocoa and 1/4 cup of the sugar into 1/2 cup of the milk, then whisk in eggs and yolks.
In  heavy bottom saucepan over medium heat, bring the remaining 2 cups of milk and 1/4 cup sugar just to the simmering point (it will wiggle in the pot).  Drizzle this hot liquid into the egg mixture, while whisking constantly.  Return the mixture to the saucepan, whisking constantly.  Cook until the mixture thickens.  Mix in the melted chocolate.  Pour into serving bowls,covering the surface with wax paper to prevent a skin from forming.  Let cool, then refrigerate until chilled.  Makes 6 servings or one pie.

I knew better. I did.

The recipe said to use one cake pan.  I wondered about that.  As I poured the batter into the pan and saw how full the pan was, I wondered again.  I went ahead and followed the recipe, and not my instincts.
I should have followed my instincts.
Had my pan had taller sides, it probably would have been okay.  Instead, it spilled out over the top of the pan and onto my oven.  Nothing like the smell of burning cake wafting through the house late at night.

When I dumped it out of the pan, it started falling apart.  I was upset, but decided to sleep on it and see in the morning if I could salvage it or if I should start all over.
I’m comfortable improvising in the kitchen, but not when it comes to baking.  Baking is chemistry.  And chemistry? Not my bag.  I ended up getting exempted from chemistry lab in high school because of my ability to set things on fire and blow things up without being able to explain how I just did that.  My love of profanities didn’t help the situation either.  When you come close to setting your chemistry lab partner on fire, it’s best to not say “oh shit” and then burst into uncontrolled giggles apparently.  (The same can be said for cutting your family’s hair.  Whoops is also not a good word to use in these situations.)
My instinct told me to use two pans and I should have listened.  From here on out, I will be better about listening to that voice.  I even noted in the cookbook to use two pans next time.  Chemistry and altering recipes might not be my thing, but I can tell when to use a different pan than called for.  I have successfully made cupcakes from a cake recipe before, so I really should have known better.
I decided to try putting the cake together with filling and frosting.  This was the first layer cake I’d attempted since the cake class I’d assisted with in February and I felt confident enough in the skills I’d picked up there to try it. 
The recipe I was following was Chocolate Blackout Cake from Wayne Harley Brachman’s Retro Desserts cookbook.  I love this cookbook.  The lemon square recipe in this is my go-to.  The cream filled chocolate cupcake recipe?  One of my standards.  So I trust this cookbook.  I think I just forgot that pastry chefs tend to have better equipment than us home chefs and their cake pans are taller. It made a difference here.

I learned in my cake class a good way to keep the filling contained between your cake layers is to pipe a row of frosting around the edge.  This cake was being frosted in a ganache frosting.  I wasn’t sure how this would work as my edging, so after some brainstorming, I made a chocolate whipped cream and used that to keep the pudding filling in place.  It also gave me a good chance to practice using my pastry bag.  I still need practice.
Turns out the whipped cream came in handy.  After I got the cake together and frosted, it was most definitely what you would call ‘wonky’.  One side had a huge divot where the cake had fallen apart and I wasn’t able to patch it with frosting.  Buttercream is much more forgiving than ganache when you have a cake that has structural issues.  The recipe called for toasting cake crumbs and using them to coat the cake.  I have tried toasting the cake crumbs in making this cake before and didn’t care for it.  I just let the cake crumbs sit out over night and after a skim coat of whipped cream, I coated it in crumbs.
The birthday boy’s request was for ‘chocolate, chocolate, chocolate and maybe some fruit’.  With that in mind, I cut some strawberries in half and used the very last of the chocolate whipped cream to ‘glue’ them to the sides of the cake.  A little time in the refrigerator to firm everything up and voila, chocolate chocolate chocolate cake with some fruit.

The finished product was tasty.  I doubled the ganache frosting and used a full batch of the pudding.  Next time I might try a double batch of pudding, as I like a nice thick filling between my cake layers.  (The recipe in the cookbook calls for 1/2 batch.  Definitely not enough.) Despite the structural issues, the cake itself was just right – not too dry, not too moist.  It could have used more pudding as filling  but everyone seemed to like it just fine the way it was.  Thankfully, thirteen year old boys are much easier to please than forty-something amateur pastry chefs.  Although I do get a kick out of hearing them talk about how I’m going to make the next birthday boy an even better cake than this one.  That’s my kind of trash talk.

Bread and Soup Season

I love soup during the winter months.  Lately, I’ve been on an Italian leaning soup kick, having made ‘clean out the freezer/fridge/pantry’ Minestrone Saturday night and Northern Italian Spinach and Cornmeal Soup last night.  Or rather, Arugula and Cornmeal soup, as I have arugula in the garden attempting to bolt because it’s been so warm this winter.  February and the arugula is bolting.  Go figure.
The arugula was a good substitute – the peppery bite gave an otherwise mild soup a nice flavor.  The little food critic that lives in our house that generally finds this soup rather ‘boring’ gave it a two thumbs up.  
What better to go with a big pot of homemade soup than a fresh baked loaf of bread?  For years I have been on the hunt for the perfect bread recipe.  I have read with some fascination about no knead loaves, but I find when I feel like having fresh baked bread, I want it NOW and not in a few days, for fresh baked bread takes time.  A good number of the no knead recipes I’ve seen call for starting the dough at least a day ahead of time, which is well and good, but sometimes I really need immediate satisfaction.  A few months ago, I found this recipe for a no-knead olive bread.  It calls for a two hour first rise, an hour long second rise and it’s no knead.  How could I not try it?
As if that wasn’t enough, it was also an olive bread.  When I worked at a local non-profit, Tuesday was Free bread day courtesy of a grocery store chain that likes to donate their day olds to local ‘charities’ (I’ve actually heard employees of this store say that to customers).  I once grabbed a loaf of what looked to be Rosemary bread, only to find it was Rosemary Olive bread and we fell in love with it.  After that, I grabbed a few loaves every week.  I have since been unable to find this bread at said grocery store and we have missed it.  Pat kept telling me I could make the bread myself, but honestly, I’ve yet to really perfect homemade bread.
Until now. 
That is my finished loaf last night.  I have baked two loaves of this in the last three days and we have eaten them.  Both Pat & I agree, this is the best bread I’ve ever made.  I have stopped searching for the best bread recipe, because this is it.  I started the dough 3:30 Saturday afternoon and we were eating it by 7 pm Saturday evening.  It’s good.

I used what I think are Black Cerignola olives from the grocery store olive bar.  (I’ve been able to find them at both Kroger and Whole Foods.)  They are large, meaty and pitted.  I cut around the stone in a way similar to how I chop mangos.   Edie, who swears up and down she can’t stand olives, eats these without complaint.   For the most part, I followed the recipe as it is on the website, with a few exceptions:
  • Adding fresh chopped rosemary along with the olives. 
  • Sprinkling sea salt on the top before putting it in the oven
  • Omitting the cornstarch wash
  • Doubling the amount of water poured into the broiler pan
  • Making two loaves, rather than four.
I imagine this bread would be good plain as well.  In the past I’ve used leftover Rosemary Olive bread in savory vegetable bread puddings, for grilled cheese and for a different take on French Toast.  I think I’ll have to track down the original cookbook and take a gander at it for sure.